
AI Agent 开发新范式 MCP从入门到多场景全链路实战
1.1 MCP新手 快速上手指南
什么是MCP? 为什么每个人必须掌握?
- MCP的概念
- 一种通信协议, 实现大模型(LLM)与外部数据源 和工具的无缝集成的协议。
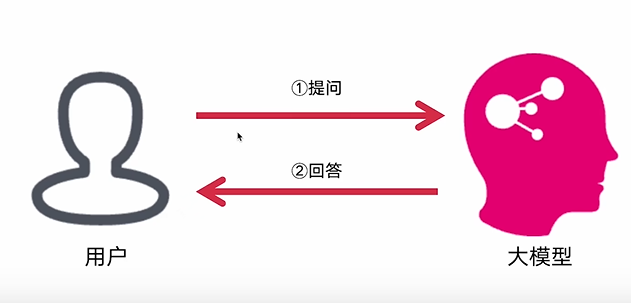
传统方式与大模型的交互方式
- 原有的交互方式:大模型仅依赖内部训练数据进行响应,相当于"闭卷考试"——无法主动获取外部信息,也不能调用工具执行任务。例如:
- 无法获取实时数据(如天气、股票行情)
- 无法调用API完成操作(如发送邮件、查询数据库)
- 无法处理计算密集型任务(如复杂数学运算、数据分析)
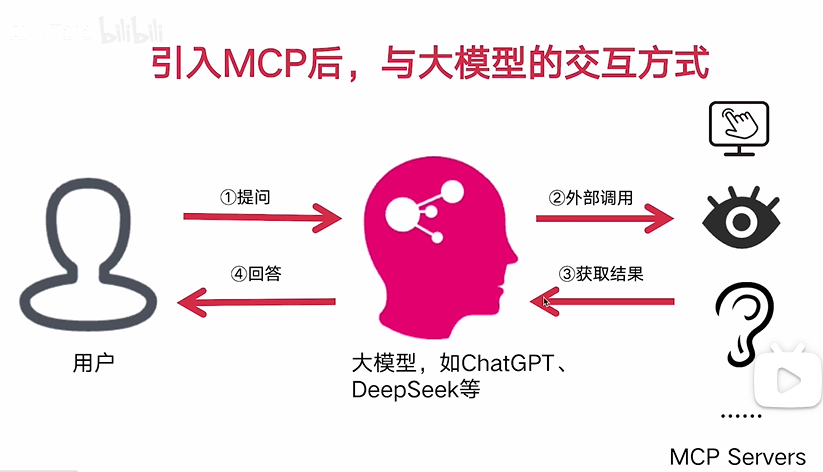
通过引入MCP之后,大模型具有了调用工具,获取数据的能力,大模型的能力进一步加强
- MCP带来的新范式:相当于给大模型配备了"开放接口",实现三大突破:
- 能力扩展:从纯文本交互升级为"思考→调用工具→获取结果→继续思考"的闭环能力
- 实时性:通过工具调用获取动态数据(如实时新闻、API返回值),打破训练数据时效性限制
- 标准化:统一的JSON-RPC 2.0协议让不同工具/数据源可被大模型无缝调用,形成可复用的工具生态
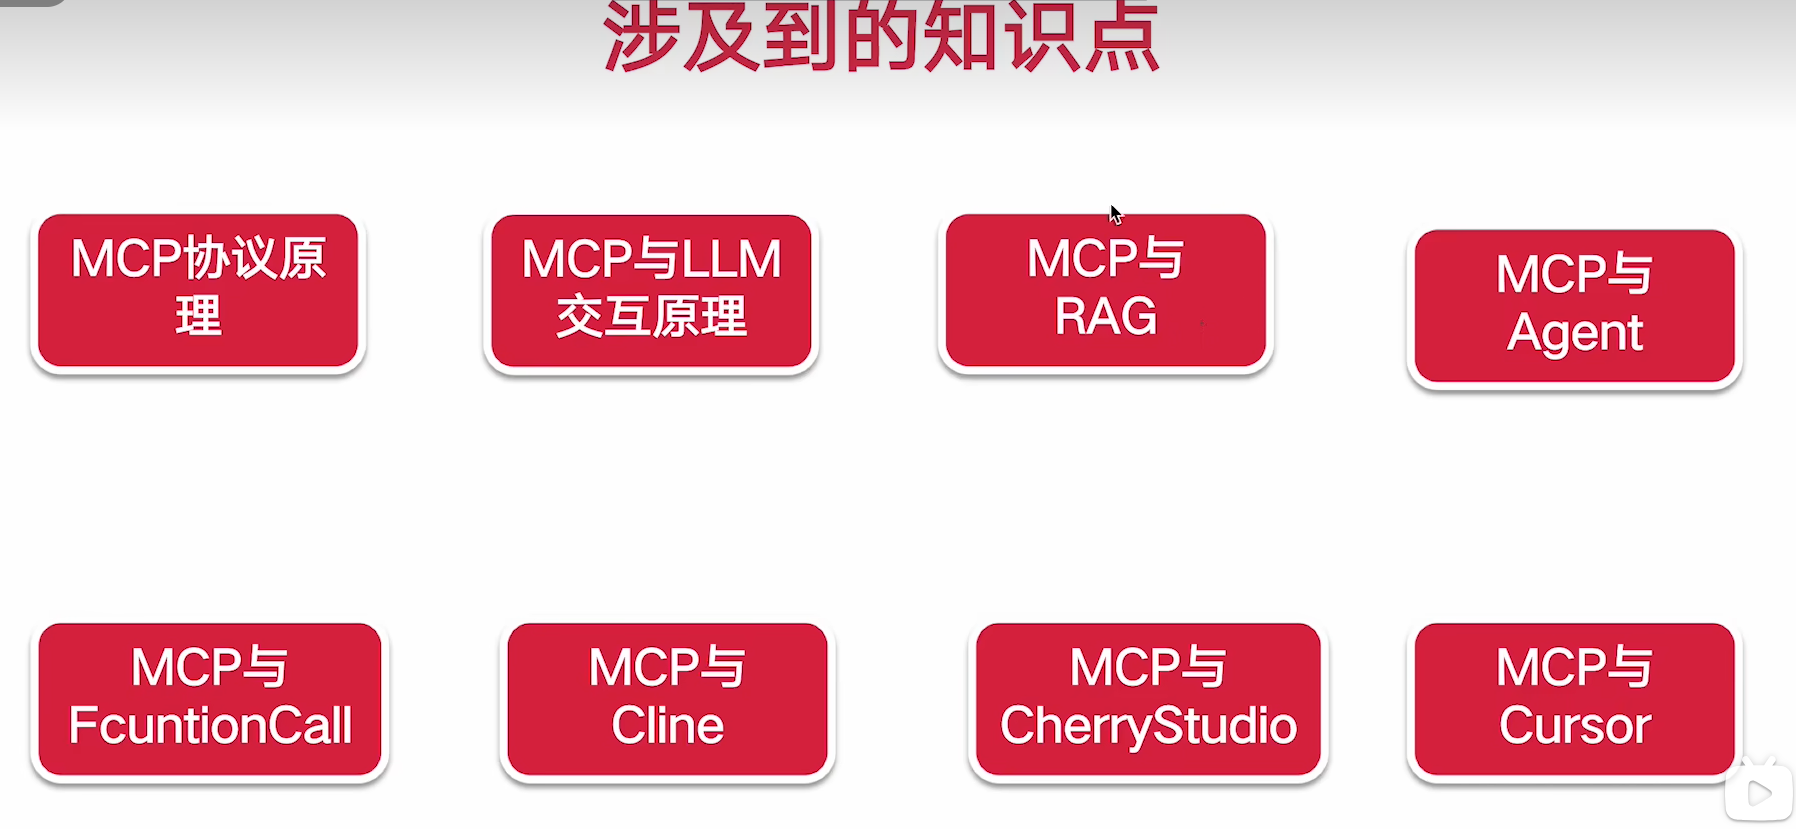
涉及到的知识点
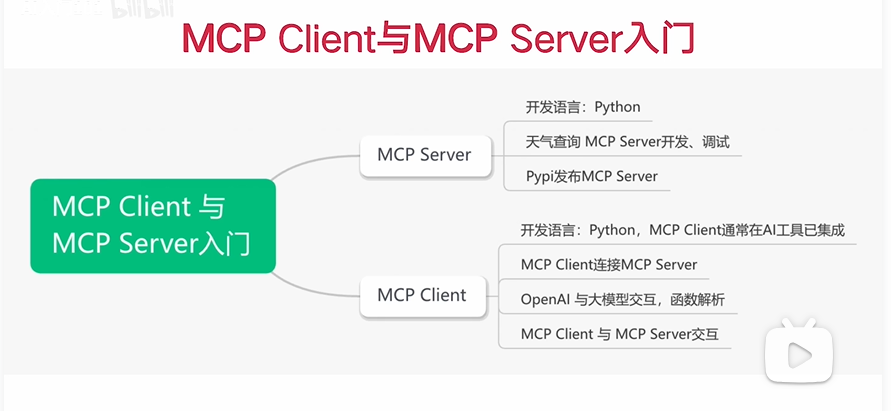
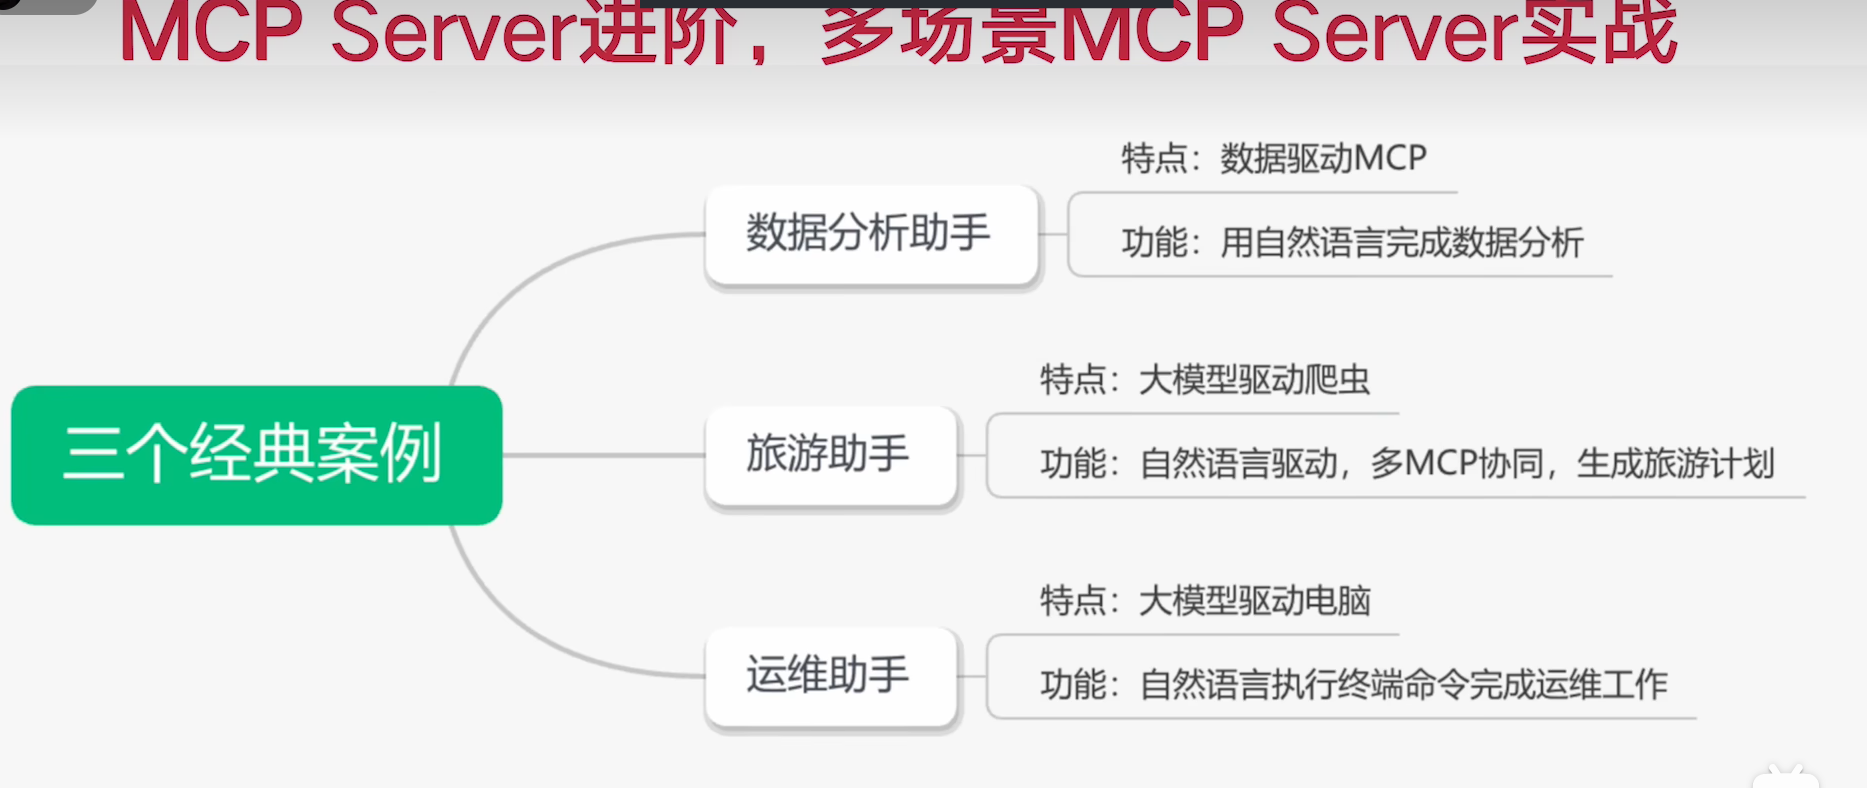
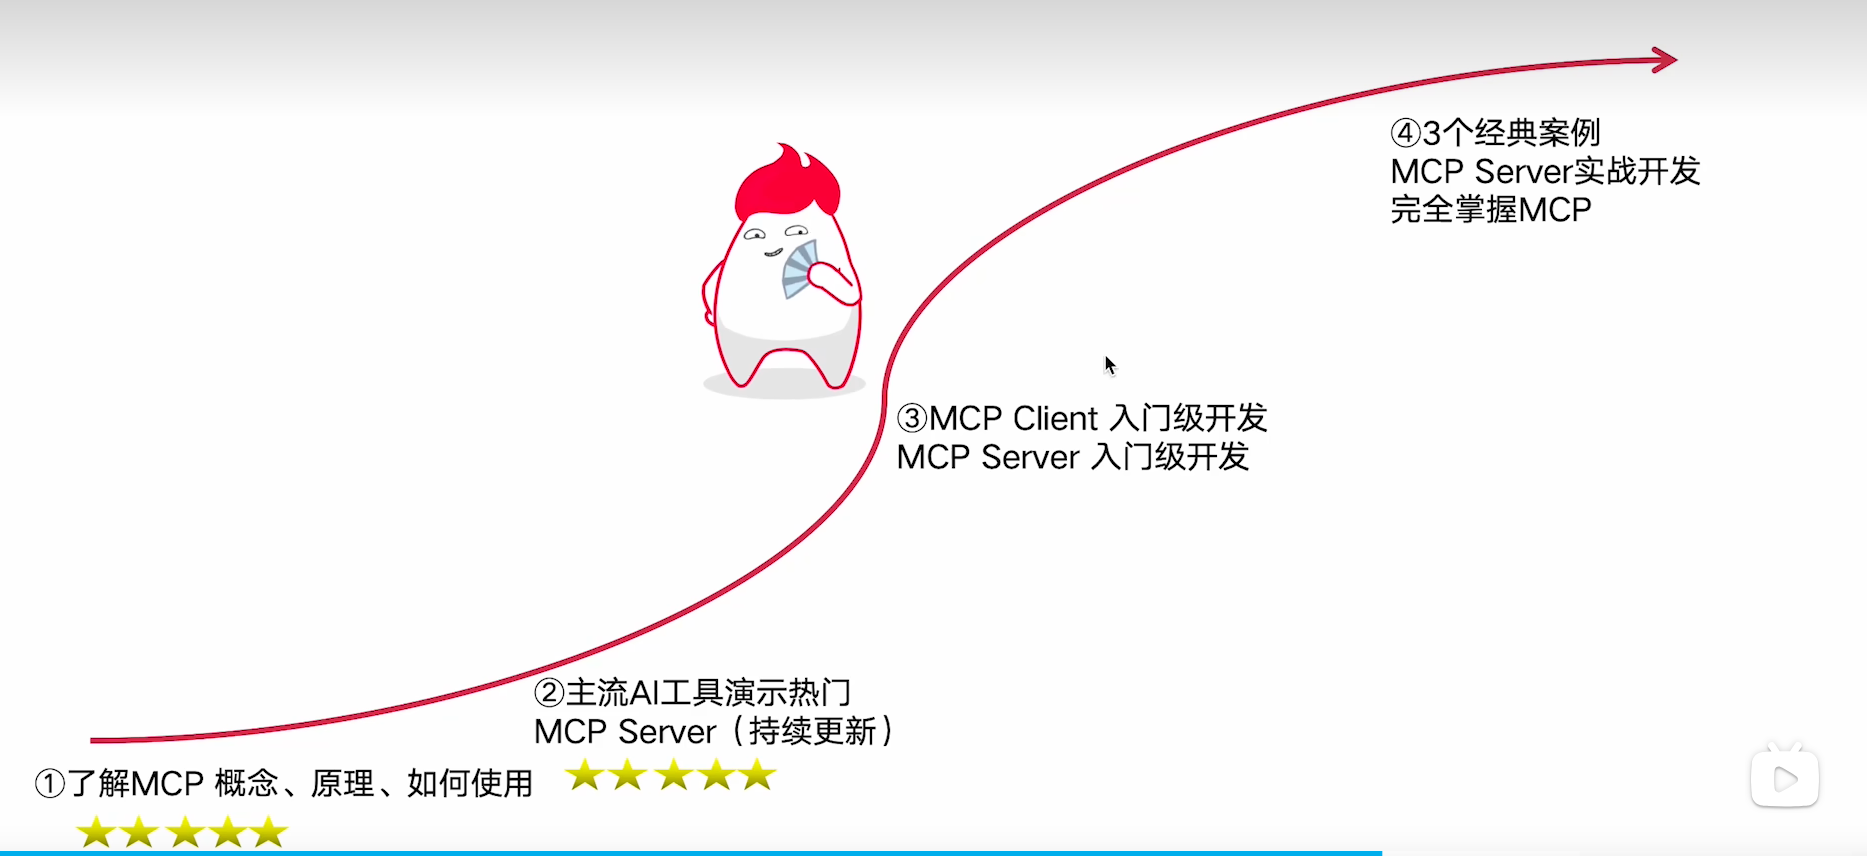
学习路线规划
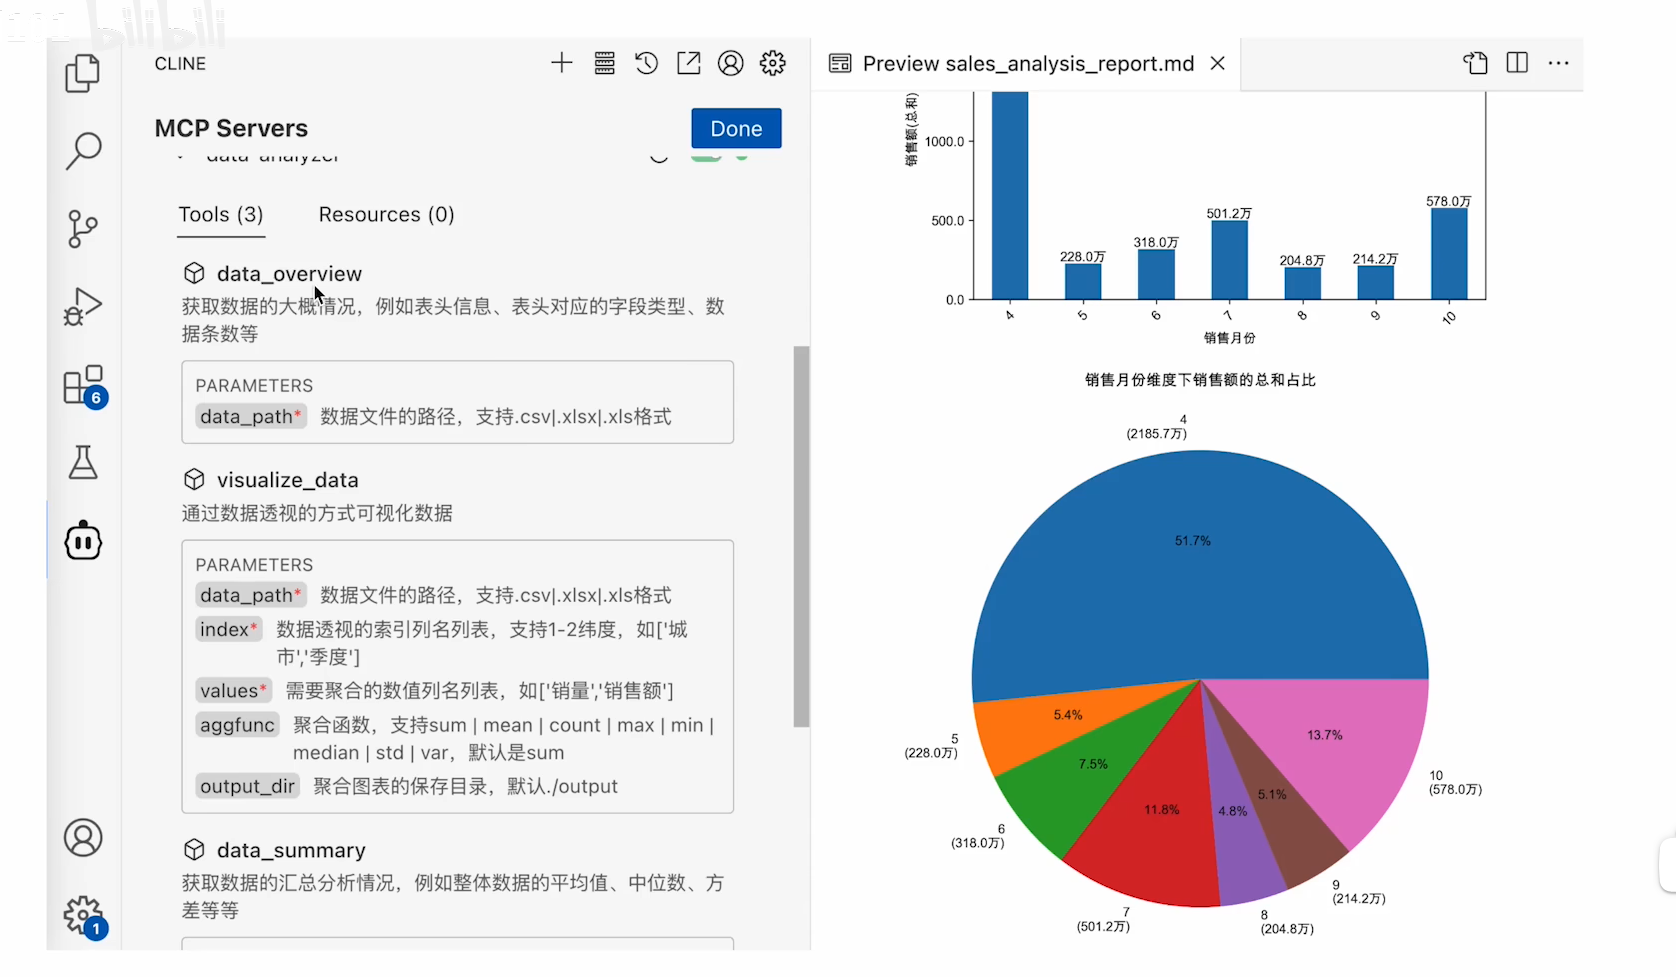
实战效果
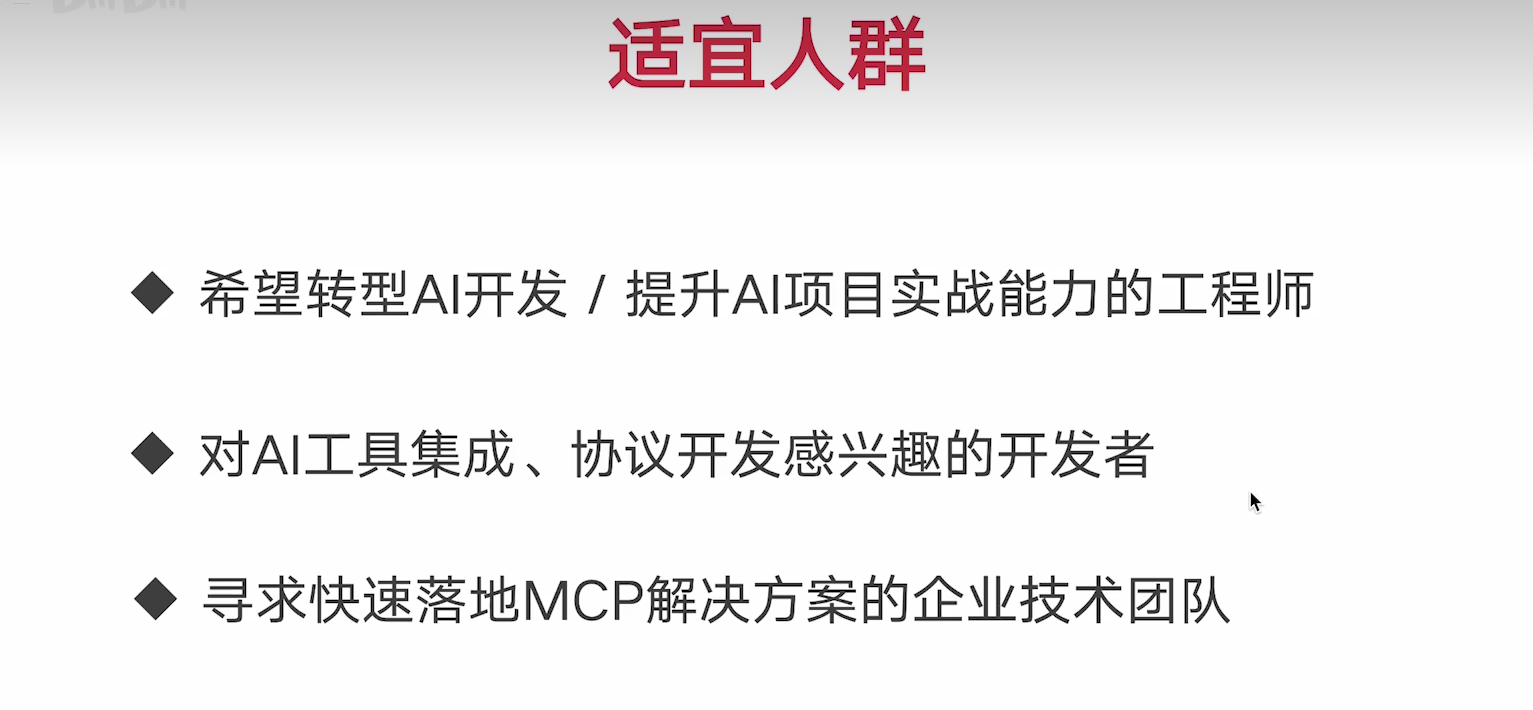
适宜人群
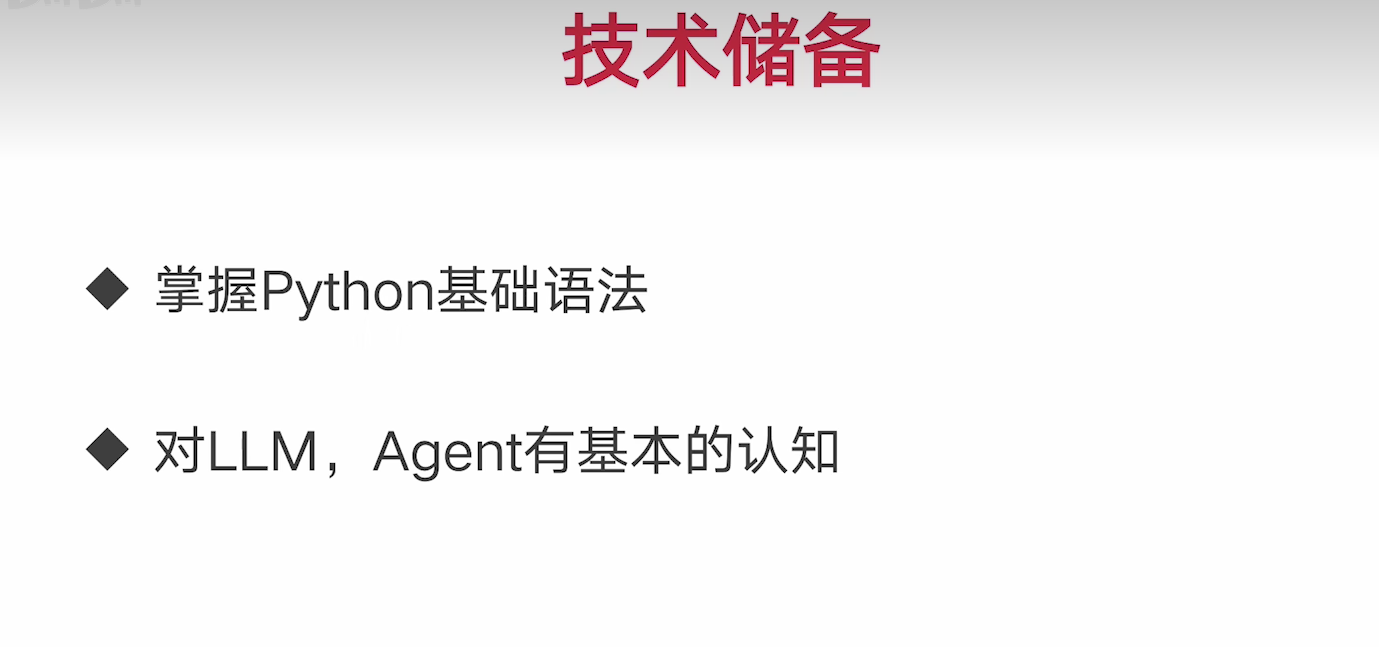
技术储备
1.2 MCP的概念
会使用MCP Server
会开发MCP Server
client部分, 很多服务已经实现,不做要求
大模型能力不足, 为了更好让大模型利用外部资源, 使用MPC协议, 实现大模型(LLM)与外部数据源 和工具的无缝集成的协议。
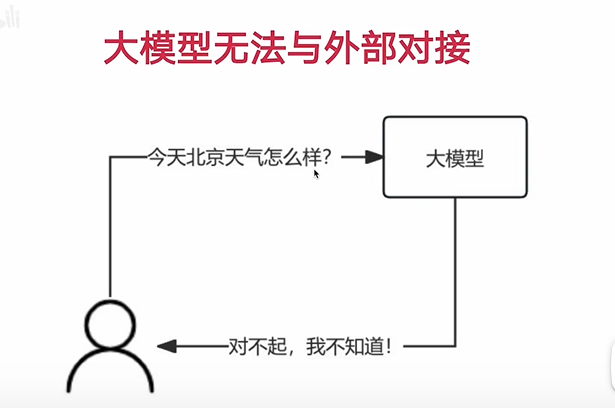
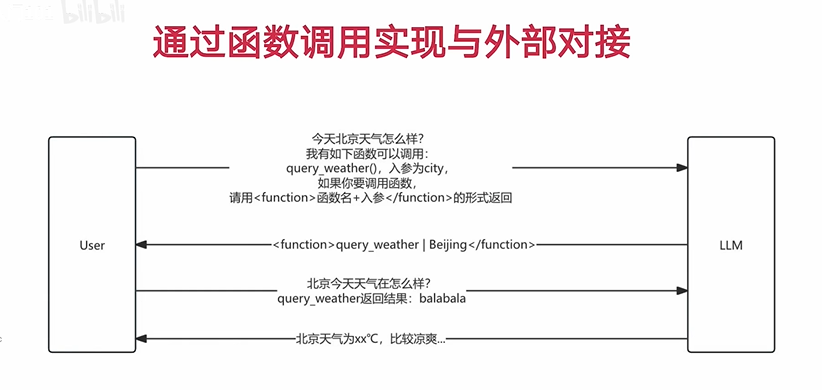
大模型与外部数据对接
mcp服务的导航网站,集成了大量的MCP服务器
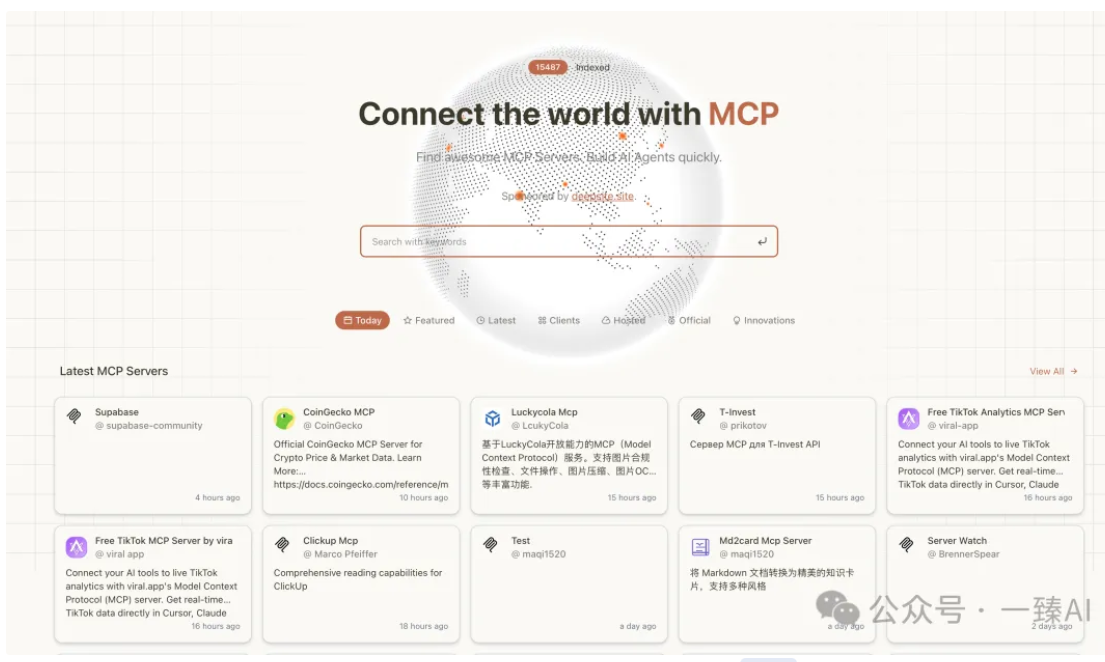
在客户端配置MCP Server ,与大模型交互
1.3 MCP 工作原理
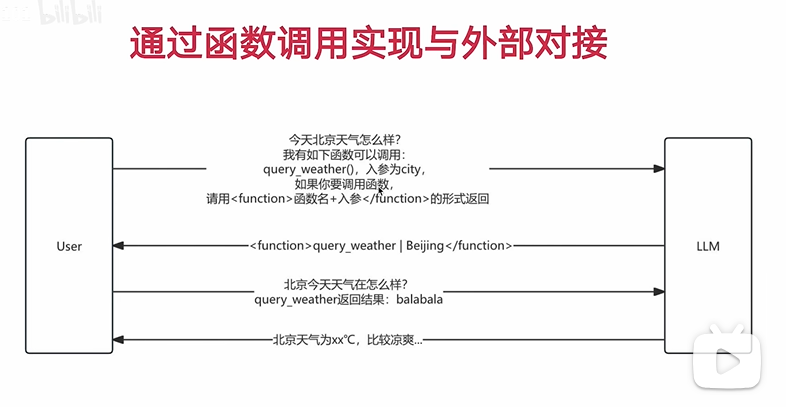
- 枚举函数
- 入参 + 出参 function Call
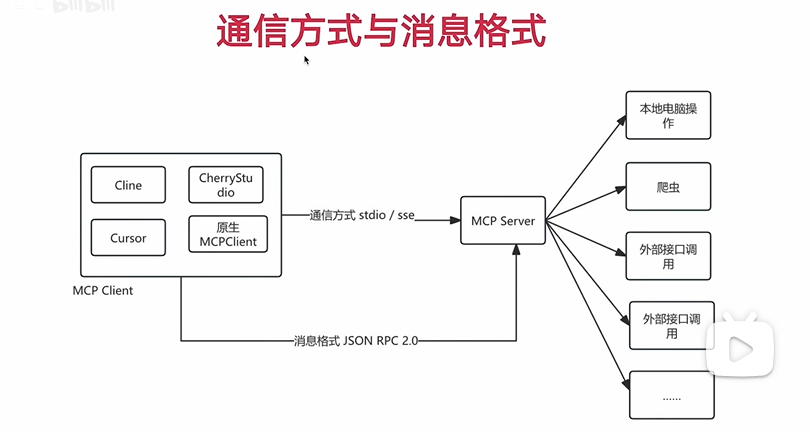
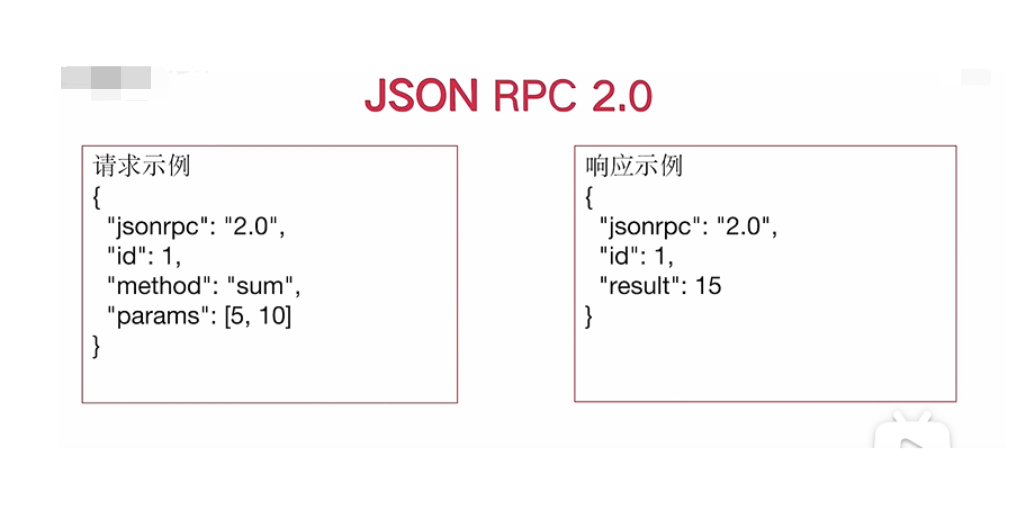
- JSON-RPC 2.0 是一种使用 JSON 格式的轻量级远程过程调用 (RPC) 协议 (一种数据格式)
https://www.cnblogs.com/zengzuo613/p/18931527
jsonrpc : 必须为 "2.0"。
method: 调用的方法名(字符串)。
params: 参数(可省略),支持对象(命名参数)或数组(位置参数)。
id: 请求标识符。
2.1 MCP与RAG 的区别
- 共同点:都是在模型的上下文之中携带更多信息,让模型更好输出
- 不同点:
- 功能定位不同:MCP是"工具连接器",核心是让模型调用外部工具/服务(如API、计算器);RAG是"文档检索器",核心是从知识库找静态文档片段
- 交互方式不同:MCP能"双向对话"(模型调用工具→工具返回结果→模型继续处理);RAG只能"单向传递"(仅把文档片段塞进上下文,不能持续互动)
- 应用场景不同:MCP适合"做事"(查实时天气、订机票, 数据分析,自动化办公,运维);RAG适合"答题"(查历史知识、产品手册)
2.2 MCP 与 Agent的联系
- 联系:MCP是Agent实现工具调用能力的核心组件,相当于Agent的"通信接口"——Agent通过MCP协议连接外部工具/服务,获取执行任务所需的资源和能力
- 区别:
- Agent是"智能体":具备任务规划、工具选择、结果整合的完整能力,像一个"智能助手"
- MCP是"通信翻译官":专注于标准化工具调用的格式和流程,像一个"接口转换器"
- 范围不同:Agent包含完整的任务处理逻辑(思考→调用→总结);MCP仅负责调用环节的通信规范
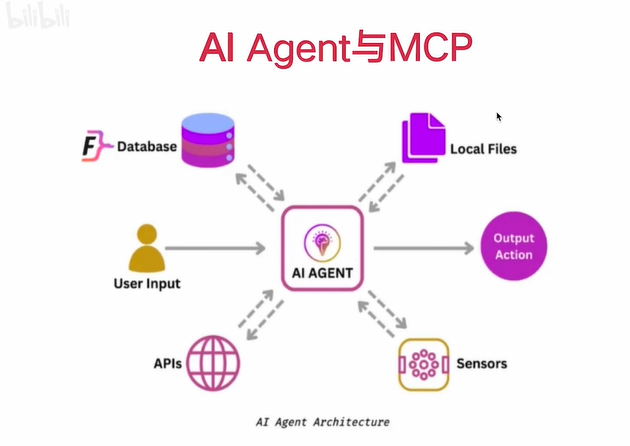
所为的新范式, 是指不需要通过过去的一个个函数方式进行调用,而是通过引入 MCP协议,获取数据的一种方式。
2.3 MCP 与 Fuction Call的关系
都是为了解决大模型无法连接外部数据的问题
总结: MCP 让 Fuction Call变得更加标准
如何解决这些问题: 告诉大模型, 如何与外界通信,引入函数概念。
MCP 解决函数封装,调用的问题, 通过 MCP更方便的调用大模型
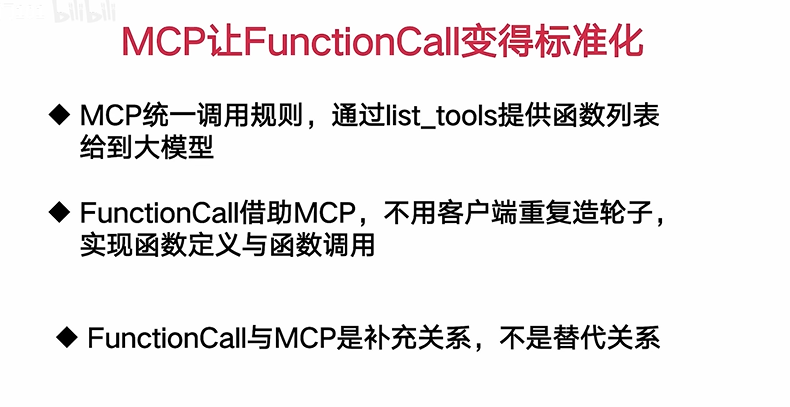
总结: MCP 是大模型与外部数据的桥梁,通过 MCP 可以让大模型调用外部数据, 也可以让外部数据调用大模型。
2.4 实际演示 MCP 与 Fuction Call的关系
3.1 热门的MCP客户端工具有哪些
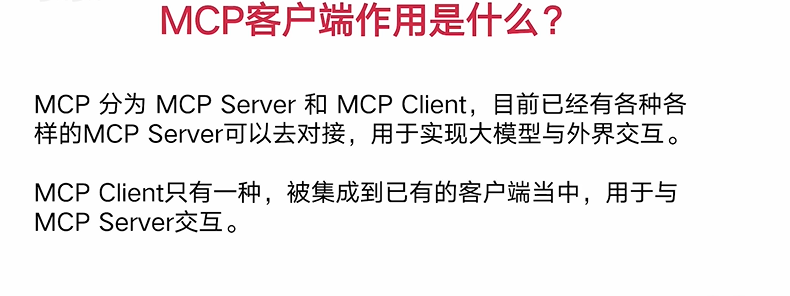
更好与 MCP server端对接
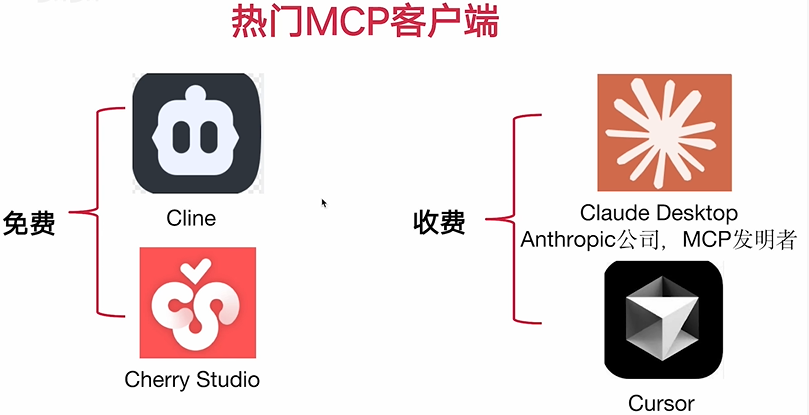
3.2 VSCode 插件 Cline演示 MCP的调用
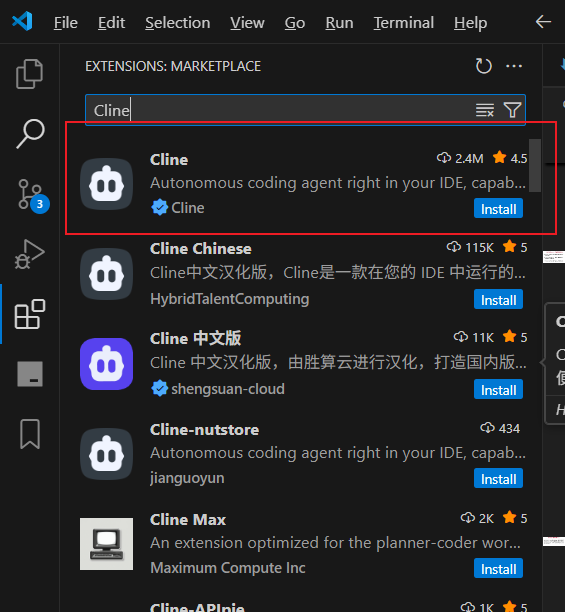
https://blog.csdn.net/qq_41035650/article/details/147838142
因为国内网络的原因, 还有windows系统的环境问题,所以需要再找办法解决调用不通的问题。
3.3 LiteLLM代理API 分析Cline与大模型的交互原理(上)
3.4 LiteLLM代理API 分析Cline与大模型的交互原理(下)
3.5 Cherry Studio演示MCP Server调用
3.6 LiteLLM代理API分析CherryStudio与大模型的交互原理
3.7 Cherry Studio 基于 sse 协议演示MCP Server调用
3.8 Cursor演示MCP Server调用
3.9 MCP 客户端使用总结
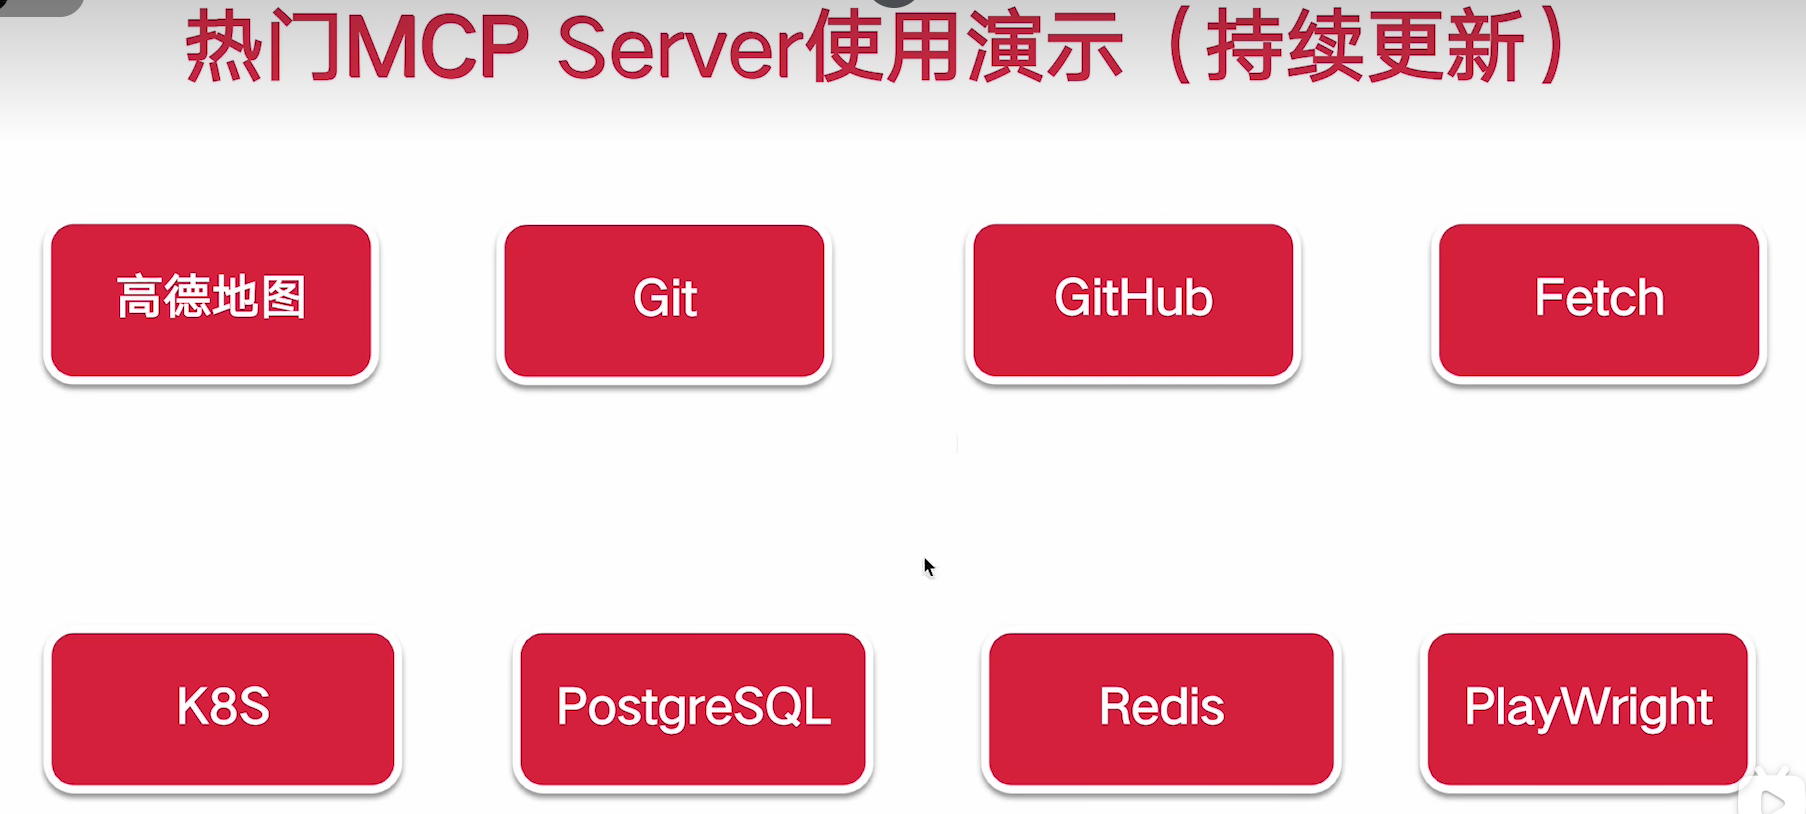
4.0 热门实用的 MCP Server 使用分享(持续更新)
4.2 时下热门的MCP Server来源梳理
4.3 高德地图MCP Server演示
4.4 PostgreSQL MCP Server演示
4.5 Git MCP Server演示
4.6 Github MCP Server演示
{
  "mcpServers": {
    "github": {
      "disabled": false,
      "timeout": 60,
      "type": "stdio",
      "command": "npx",
      "args": [
        "-y",
        "@modelcontextprotocol/server-github"
      ],
      "env": {
        "GITHUB_PERSONAL_ACCESS_TOKEN": "...."
      }
    }
  }
}帮我查询,我的github项目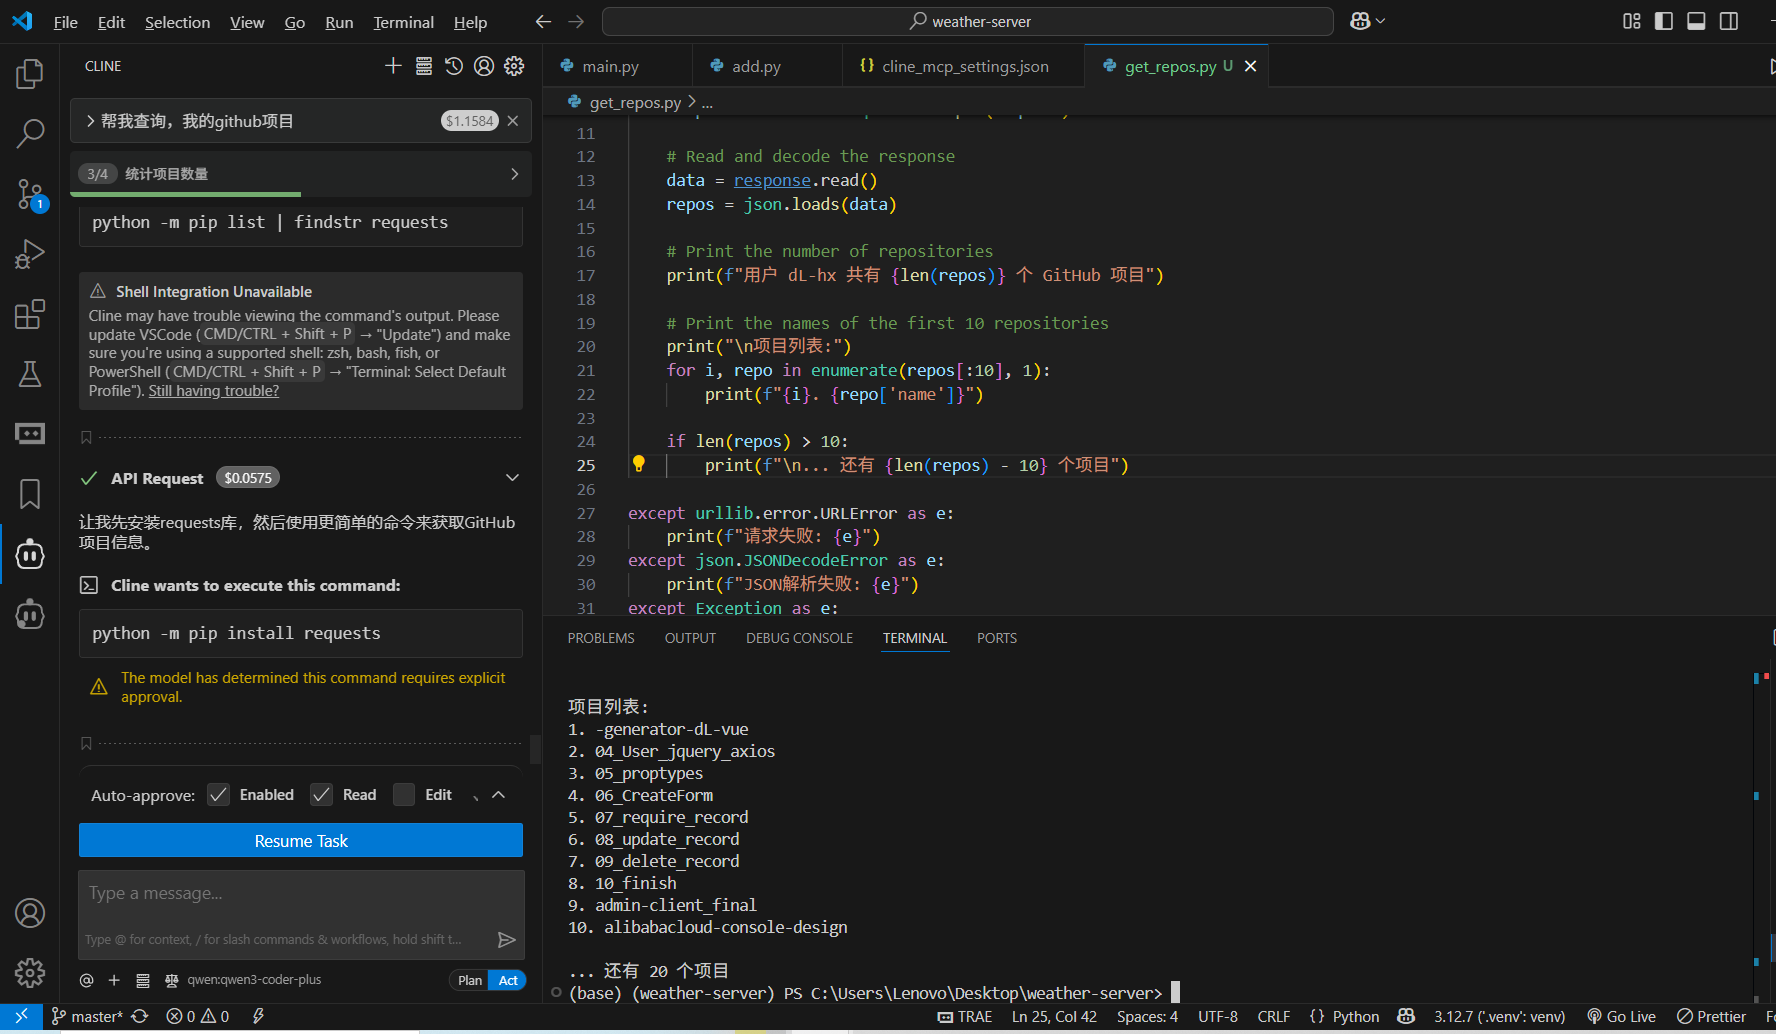
4.7 Fetch MCP Server演示
4.8 Redis MCP Server踩坑演示
4.9 Puppeteer+PlayWright MCP Server演示
4.10 Kubernetes MCP Server演示
4.11 FireCrawl爬虫MCP Server演示
4.12 Zapier MCP Server 演示
5.0 自定义MCP Server与MCP Client入门级开发实战
5.1 自定义MCP Server开发
尝试自己开发mcp server , 语言 选择 python
- uv安装
$ pip install uv

// 天气查询的mcp server 初始化
$ uv init weather-server

$ uv add "mcp[cli]" httpx在python 项目目录下运行, 启动mcp server 调试
$ python main.py
或
$ mcp dev main.py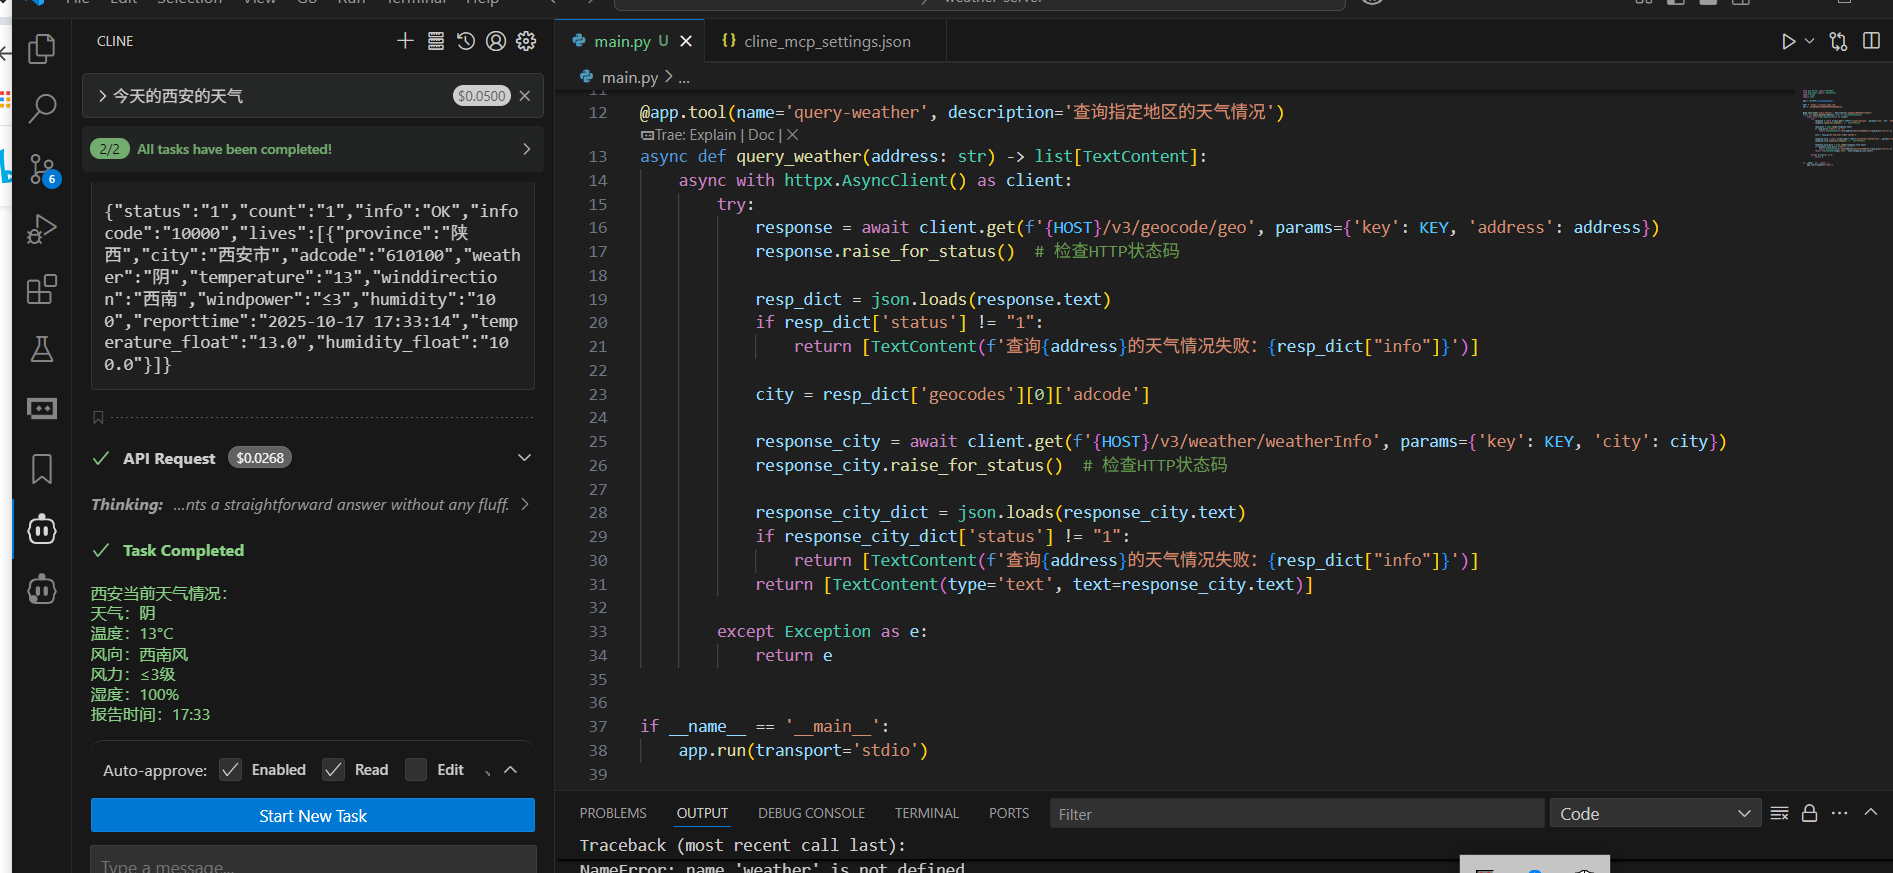
from mcp.server import FastMCP
from mcp.types import TextContent
import httpx
import json

app = FastMCP('weather-server')

HOST = 'https://restapi.amap.com'
KEY = 'ee50d4053a18506d66a0f826de884cd1'


@app.tool(name='query-weather', description='查询指定地区的天气情况')
async def query_weather(address: str) -> list[TextContent]:
    async with httpx.AsyncClient() as client:
        try:
            response = await client.get(f'{HOST}/v3/geocode/geo', params={'key': KEY, 'address': address})
            response.raise_for_status()  # 检查HTTP状态码

            resp_dict = json.loads(response.text)
            if resp_dict['status'] != "1":
                return [TextContent(f'查询{address}的天气情况失败:{resp_dict["info"]}')]

            city = resp_dict['geocodes'][0]['adcode']

            response_city = await client.get(f'{HOST}/v3/weather/weatherInfo', params={'key': KEY, 'city': city})
            response_city.raise_for_status()  # 检查HTTP状态码

            response_city_dict = json.loads(response_city.text)
            if response_city_dict['status'] != "1":
                return [TextContent(f'查询{address}的天气情况失败:{resp_dict["info"]}')]
            return [TextContent(type='text', text=response_city.text)]

        except Exception as e:
            return e


if __name__ == '__main__':
app.run(transport='stdio'){
"mcpServers": {
"weather-server": {
"disabled": false,
"timeout": 60,
"type": "stdio",
"command": "uv",
"args": [
"--directory",
"C:\\Users\\Lenovo\\Desktop\\weather-server",
"run",
"main.py"
]
}
}
}5.2 自定义实现MCP 加法计算
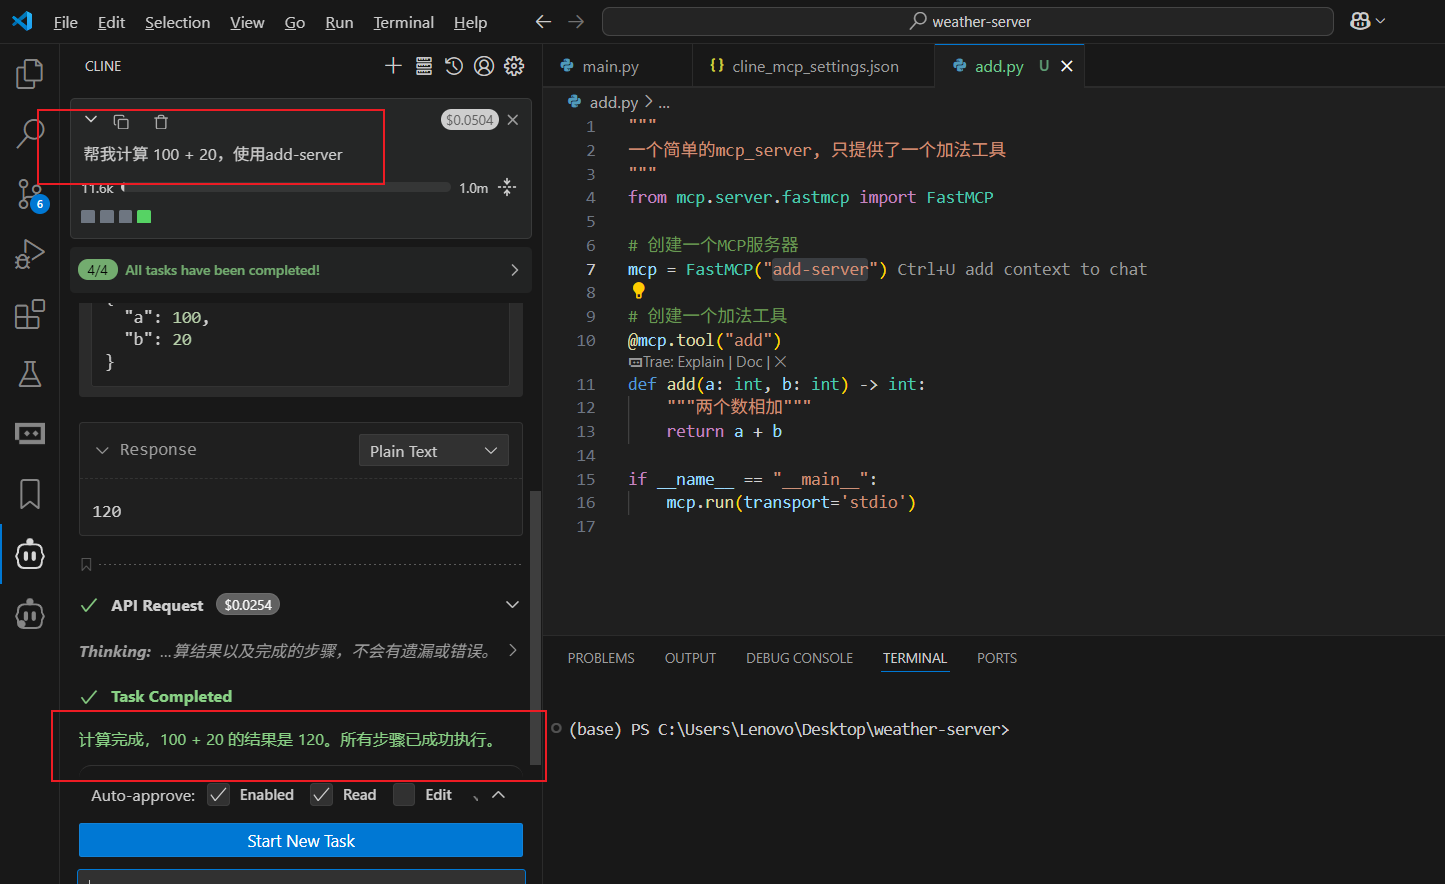
"""
一个简单的mcp_server, 只提供了一个加法工具
"""
from mcp.server.fastmcp import FastMCP

# 创建一个MCP服务器
mcp = FastMCP("add-server")

# 创建一个加法工具
@mcp.tool("add")
def add(a: int, b: int) -> int:
    """两个数相加"""
    return a + b

if __name__ == "__main__":
mcp.run(transport='stdio'){
"mcpServers": {
"add-server": {
"disabled": false,
"timeout": 60,
"type": "stdio",
"command": "uv",
"args": [
"--directory",
"C:\\Users\\Lenovo\\Desktop\\weather-server",
"run",
"add.py"
]
}
}
}5.3 自定义实现 MCP Client开发
5.4 (Node版本) 自定义实现MCP 加法计算
项目初始化
https://docs.mcpservers.cn/quickstart/server#node
npm init -y
cnpm install @modelcontextprotocol/sdk zod@3.1.12
cnpm install -D @types/node typescript调试项目
npx @modelcontextprotocol/inspector node ./build/index.jssrc/index.ts
/**
 * 新手版 MCP 计算器服务器
 *
 * 这是一个简化的MCP服务器示例,适合初学者学习
 * 提供基本的加减乘除运算功能
 *
 * 安装依赖:
 * npm install @modelcontextprotocol/sdk zod
 *
 * 编译运行:
 * npx tsc
 * node build/server/index.js
 */

// 导入需要的模块
import { McpServer } from "@modelcontextprotocol/sdk/server/mcp.js";
import { StdioServerTransport } from "@modelcontextprotocol/sdk/server/stdio.js";
import { z } from "zod";

// 创建服务器
const server = new McpServer({
  name: "simple-calculator",
  version: "1.0.0",
  capabilities: {
    resources: {},
    tools: {},
  },
});

// 定义数字验证规则
const NumberSchema = z.number().describe("数字");

// 加法工具
server.tool(
  "add",
  "计算两个数字相加",
  {
    a: NumberSchema,
    b: NumberSchema,
  },
  async ({ a, b }) => {
    const result = a + b;

    return {
      content: [
        {
          type: "text",
          text: `${a} + ${b} = ${result}`,
        },
      ],
    };
  }
);

// 减法工具
server.tool(
  "subtract",
  "计算两个数字相减",
  {
    a: NumberSchema,
    b: NumberSchema,
  },
  async ({ a, b }) => {
    const result = a - b;

    return {
      content: [
        {
          type: "text",
          text: `${a} - ${b} = ${result}`,
        },
      ],
    };
  }
);

// 乘法工具
server.tool(
  "multiply",
  "计算两个数字相乘",
  {
    a: NumberSchema,
    b: NumberSchema,
  },
  async ({ a, b }) => {
    const result = a * b;

    return {
      content: [
        {
          type: "text",
          text: `${a} × ${b} = ${result}`,
        },
      ],
    };
  }
);

// 除法工具
server.tool(
  "divide",
  "计算两个数字相除",
  {
    a: NumberSchema,
    b: NumberSchema,
  },
  async ({ a, b }) => {
    // 检查除数是否为零
    if (b === 0) {
      return {
        content: [
          {
            type: "text",
            text: "错误:不能除以零",
          },
        ],
      };
    }

    const result = a / b;

    return {
      content: [
        {
          type: "text",
          text: `${a} ÷ ${b} = ${result}`,
        },
      ],
    };
  }
);

// 启动服务器
async function main() {
  try {
    const transport = new StdioServerTransport();
    await server.connect(transport);
    console.error("计算器服务器已启动");
  } catch (error) {
    console.error("启动失败:", error);
    process.exit(1);
  }
}

main().catch((error) => {
  console.error("运行出错:", error);
  process.exit(1);
});

/*
使用方法:
1. 安装依赖包
   npm install @modelcontextprotocol/sdk zod
2. 编译 TypeScript
   npx tsc
3. 在 VS Code 中配置 .vscode/mcp.json:
   {
     "servers": {
       "calculator": {
         "type": "stdio",
         "command": "node",
         "args": ["你的绝对路径/server/index.js"]
       }
     }
   }
4. 重启 VS Code,然后就可以使用计算功能了
代码说明:
- McpServer: 创建 MCP 服务器
- server.tool(): 定义可用的工具/功能
- NumberSchema: 验证输入必须是数字
- async/await: 处理异步操作
- StdioServerTransport: 使用标准输入输出通信
每个工具包含:
- 名称 (如 "add")
- 描述 (如 "计算两个数字相加")
- 参数定义 (如 {a: NumberSchema, b: NumberSchema})
- 实现函数 (执行具体的计算逻辑)
*/生成js文件并运行
执行如下代码编译ts文件为js文件,默认生成在同一路径
这将会将当前项目下的所有ts代码转换为js
npx tsc使用inspector 启动客户端,并指定服务端代码路径 http://localhost:6274/?MCP_PROXY_AUTH_TOKEN=aac1710fc963b2cb032bb451c843067a13159f4e0d3b8d21db58fc412bf02239#resources
npx @modelcontextprotocol/inspector node ./build/index.js结果
这样就可以在UI界面尽情测试了 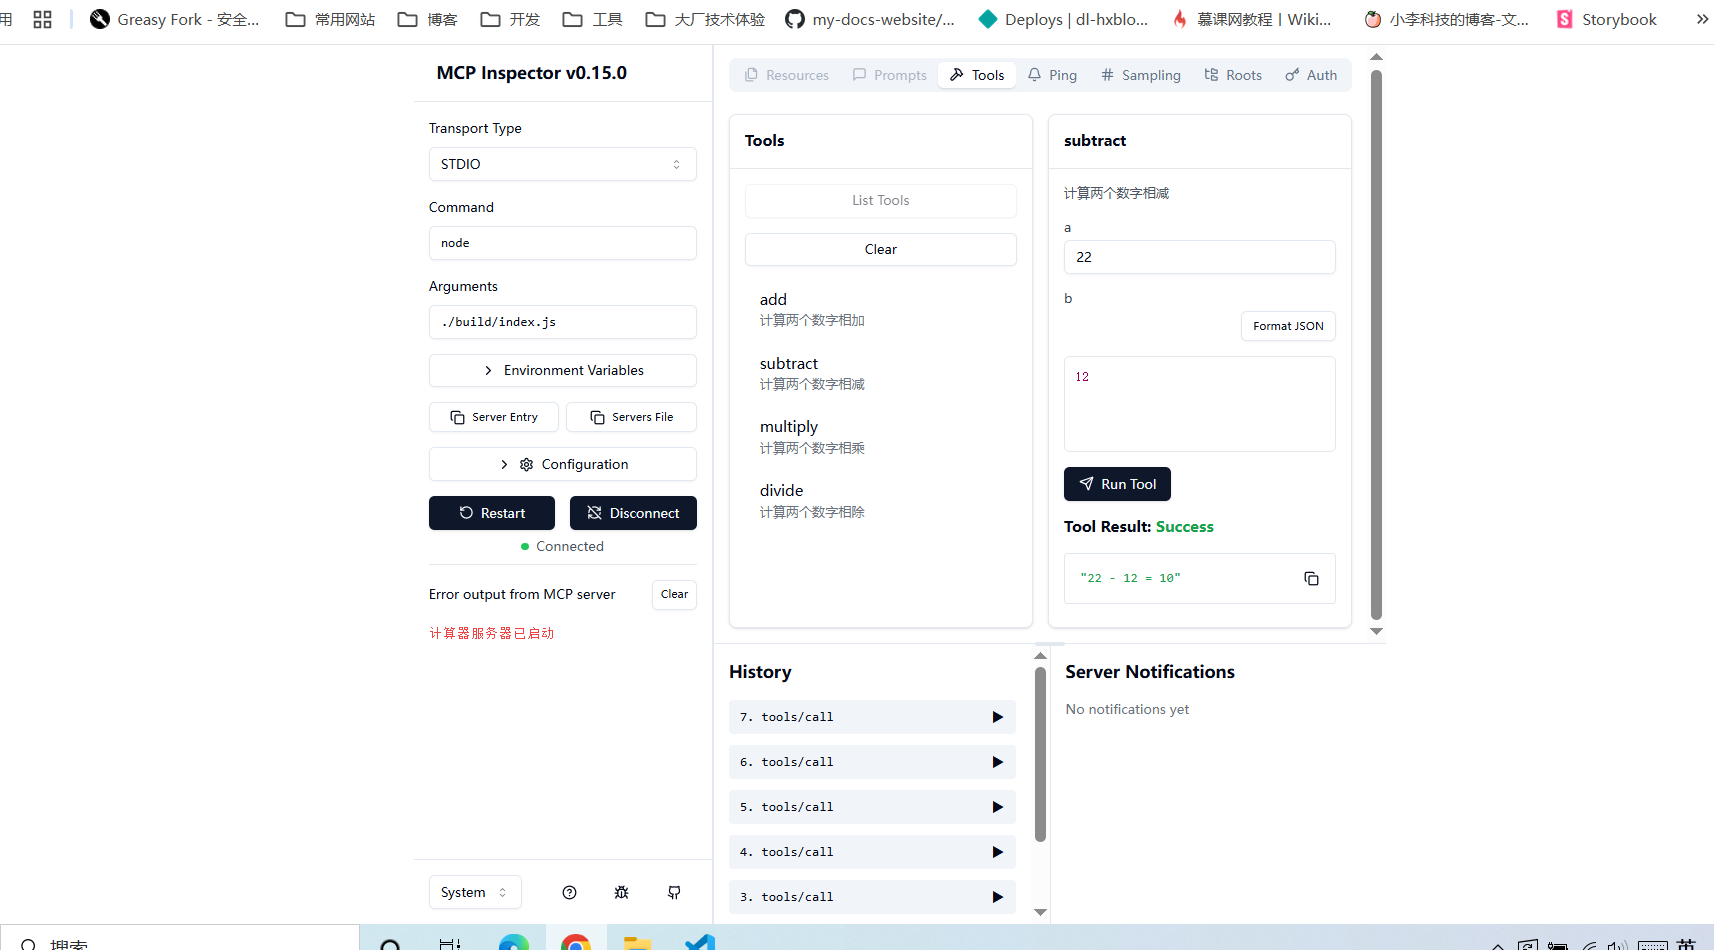
使用cherry studio 调试mcp 项目
https://www.cherry-ai.com/download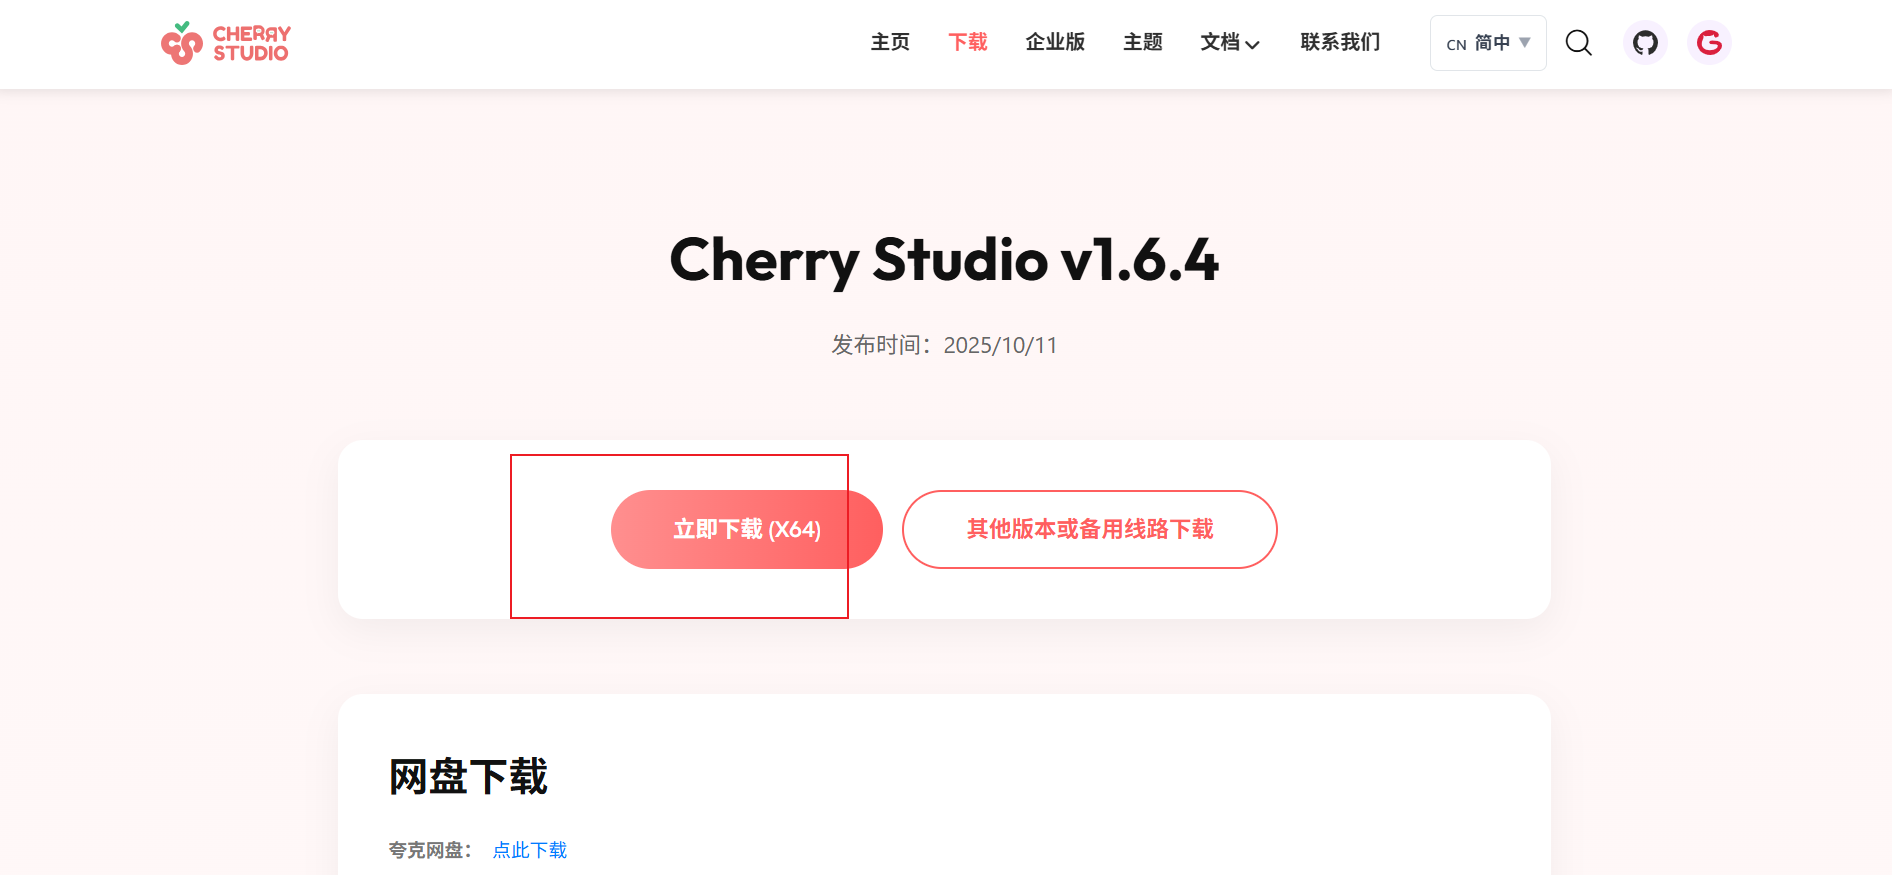
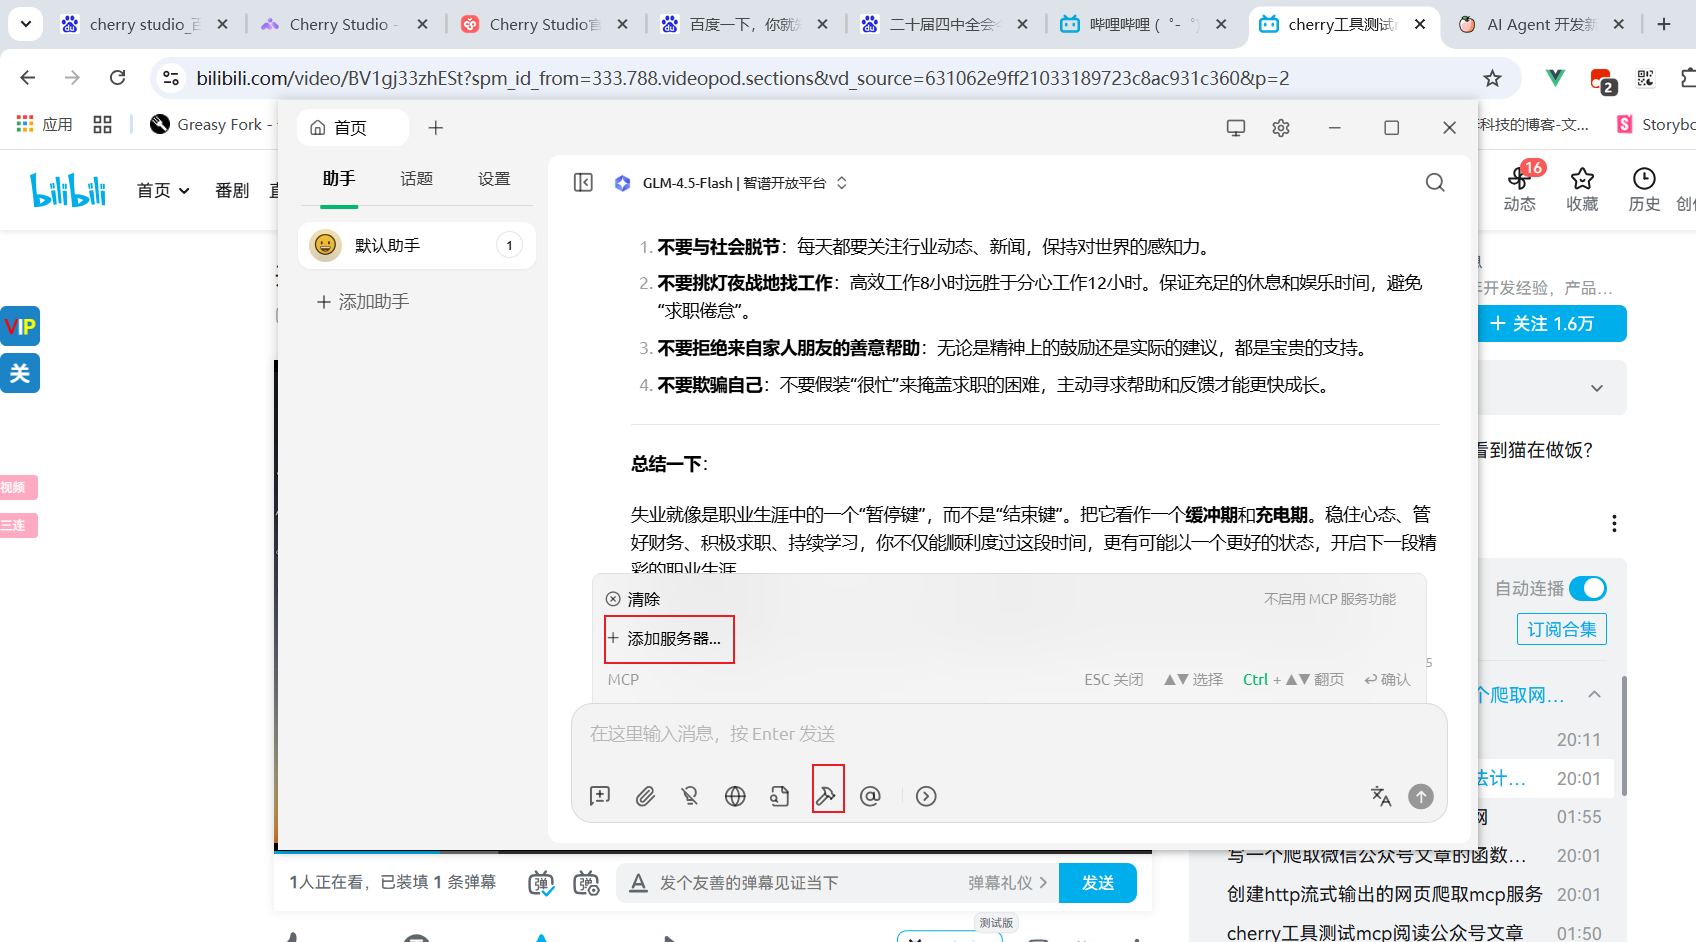
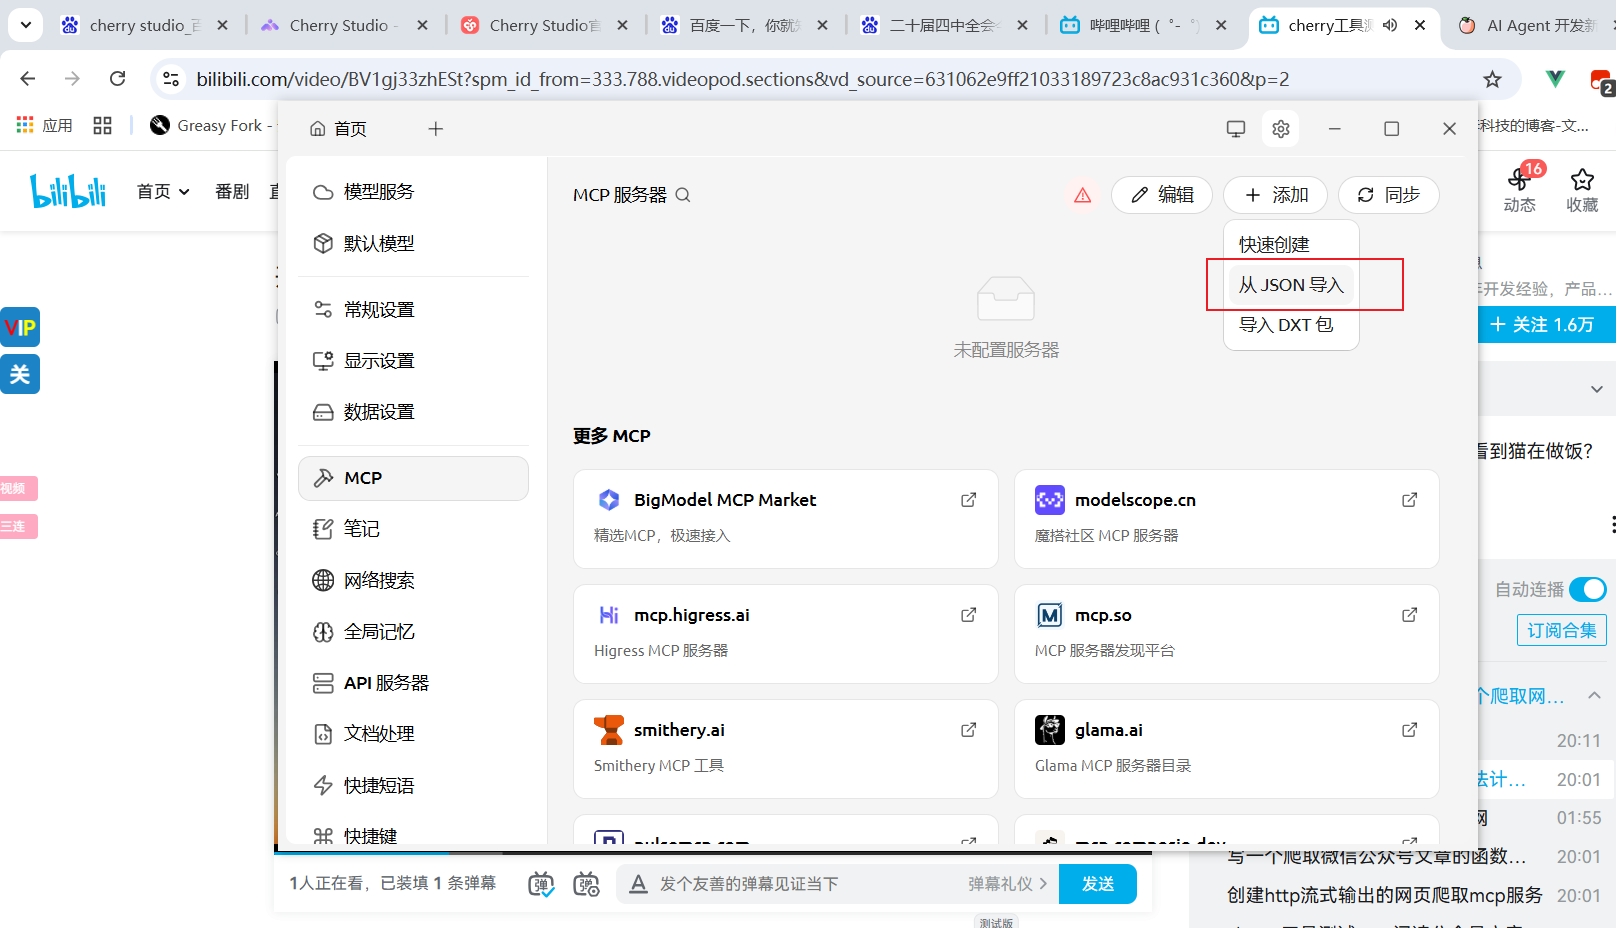
复制 这些配置到cherry studio 中
{
  "mcpServers": {
    "simple-calculator": {
      "command": "node",
      "args": ["C:\\Users\\Lenovo\\Desktop\\mcp-chatbot-server\\build\\index.js"]
    }
  }
}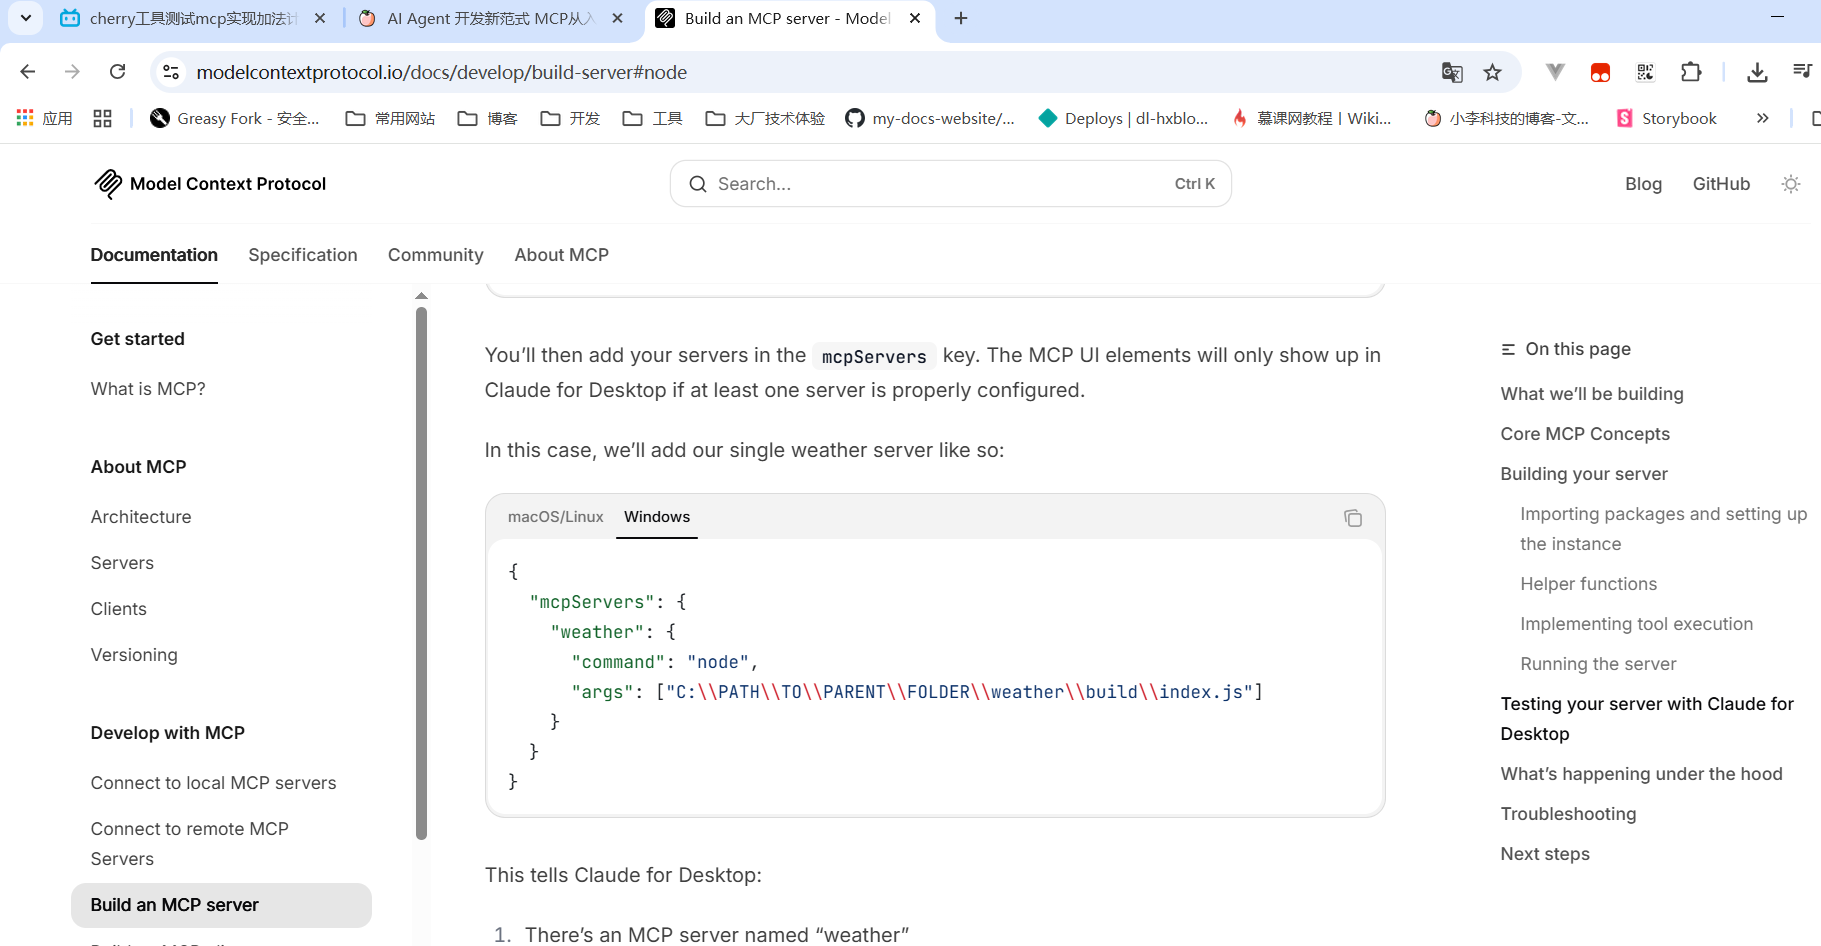
https://modelcontextprotocol.io/docs/develop/build-server#node
复制路径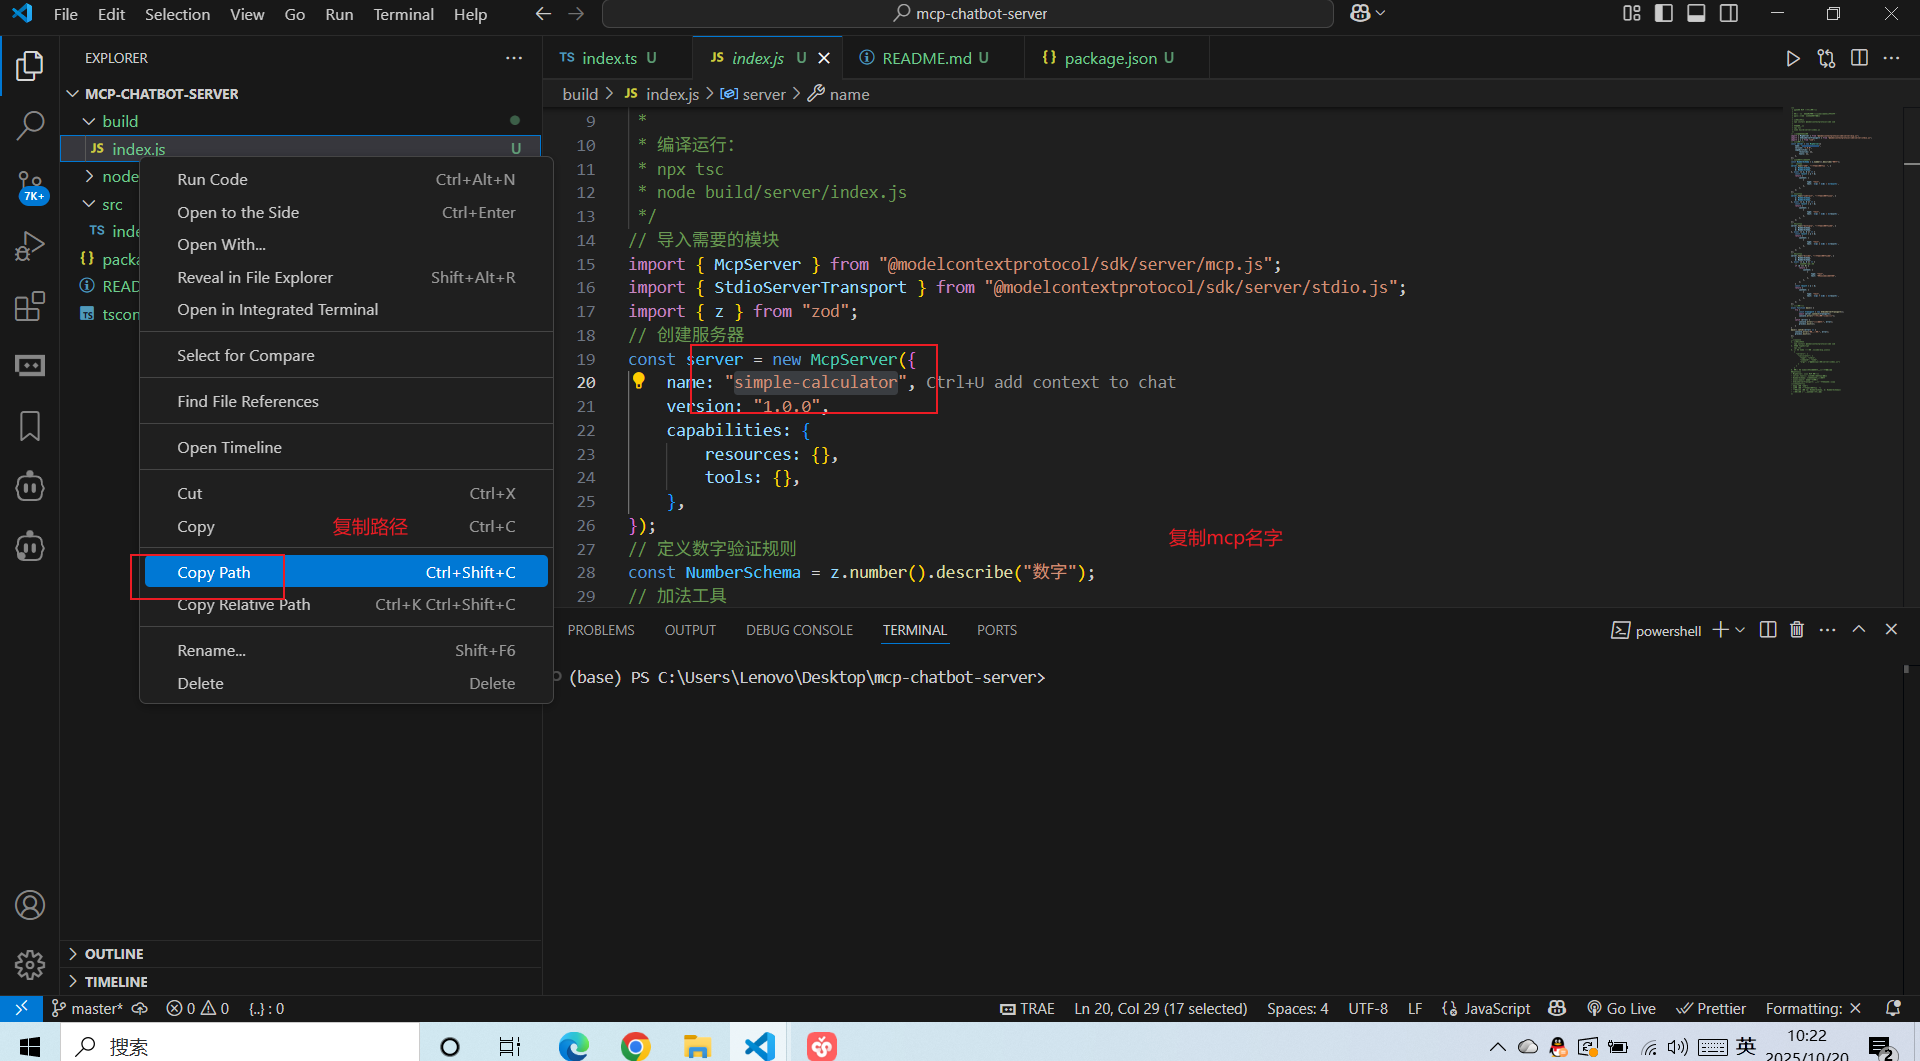
复制mcp名称,然后点击确定
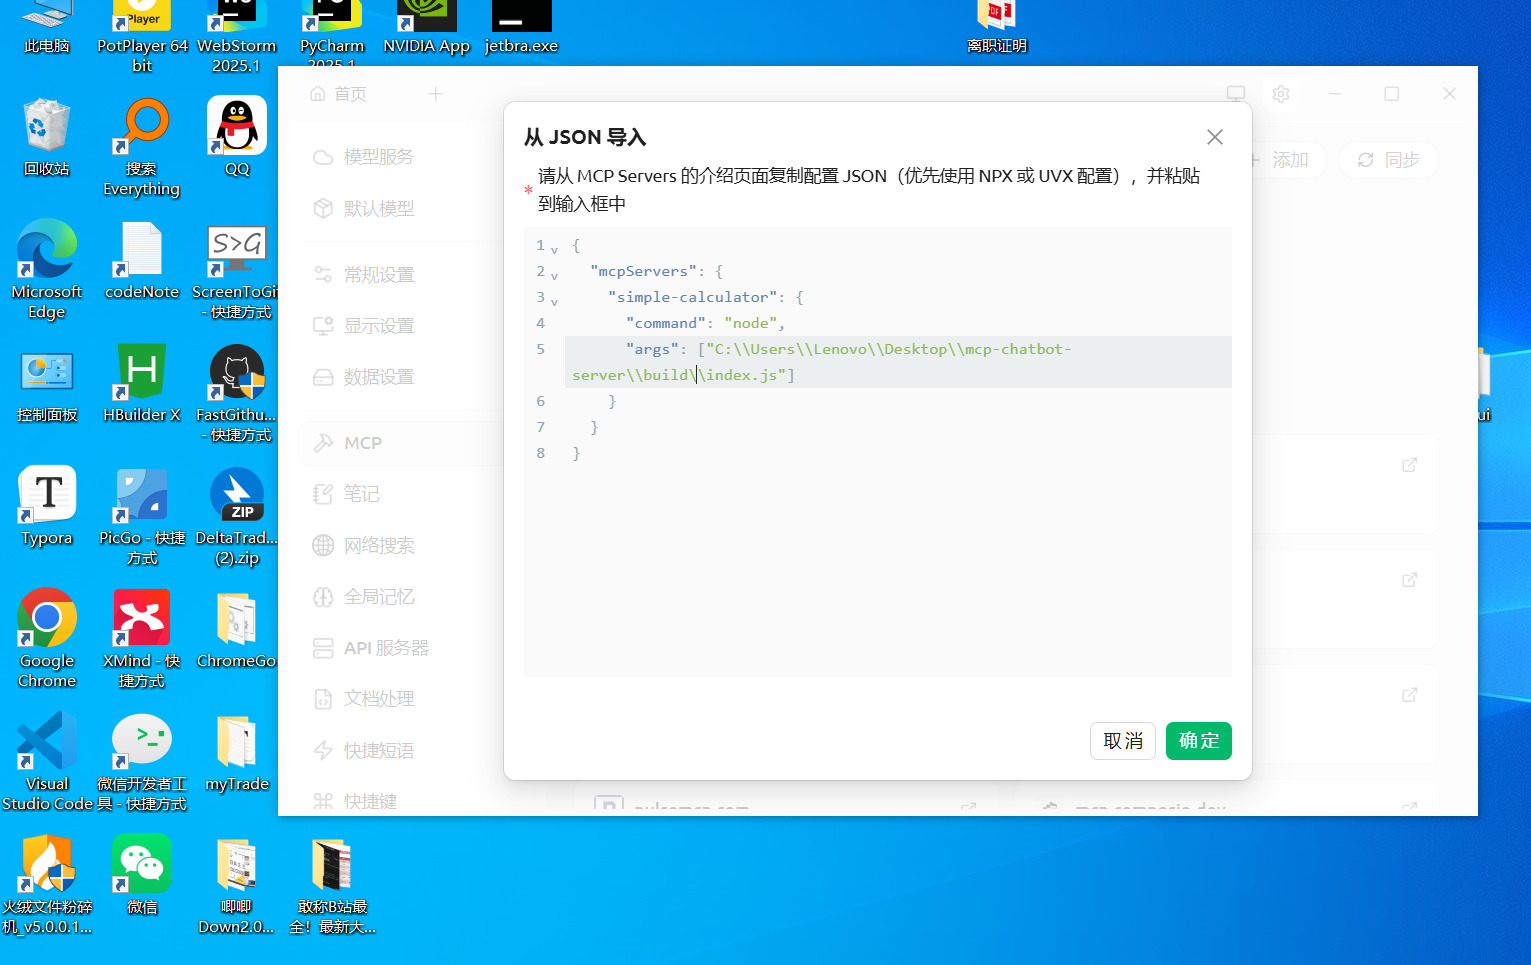
返回首页, 选中这个mcp服务进行调试 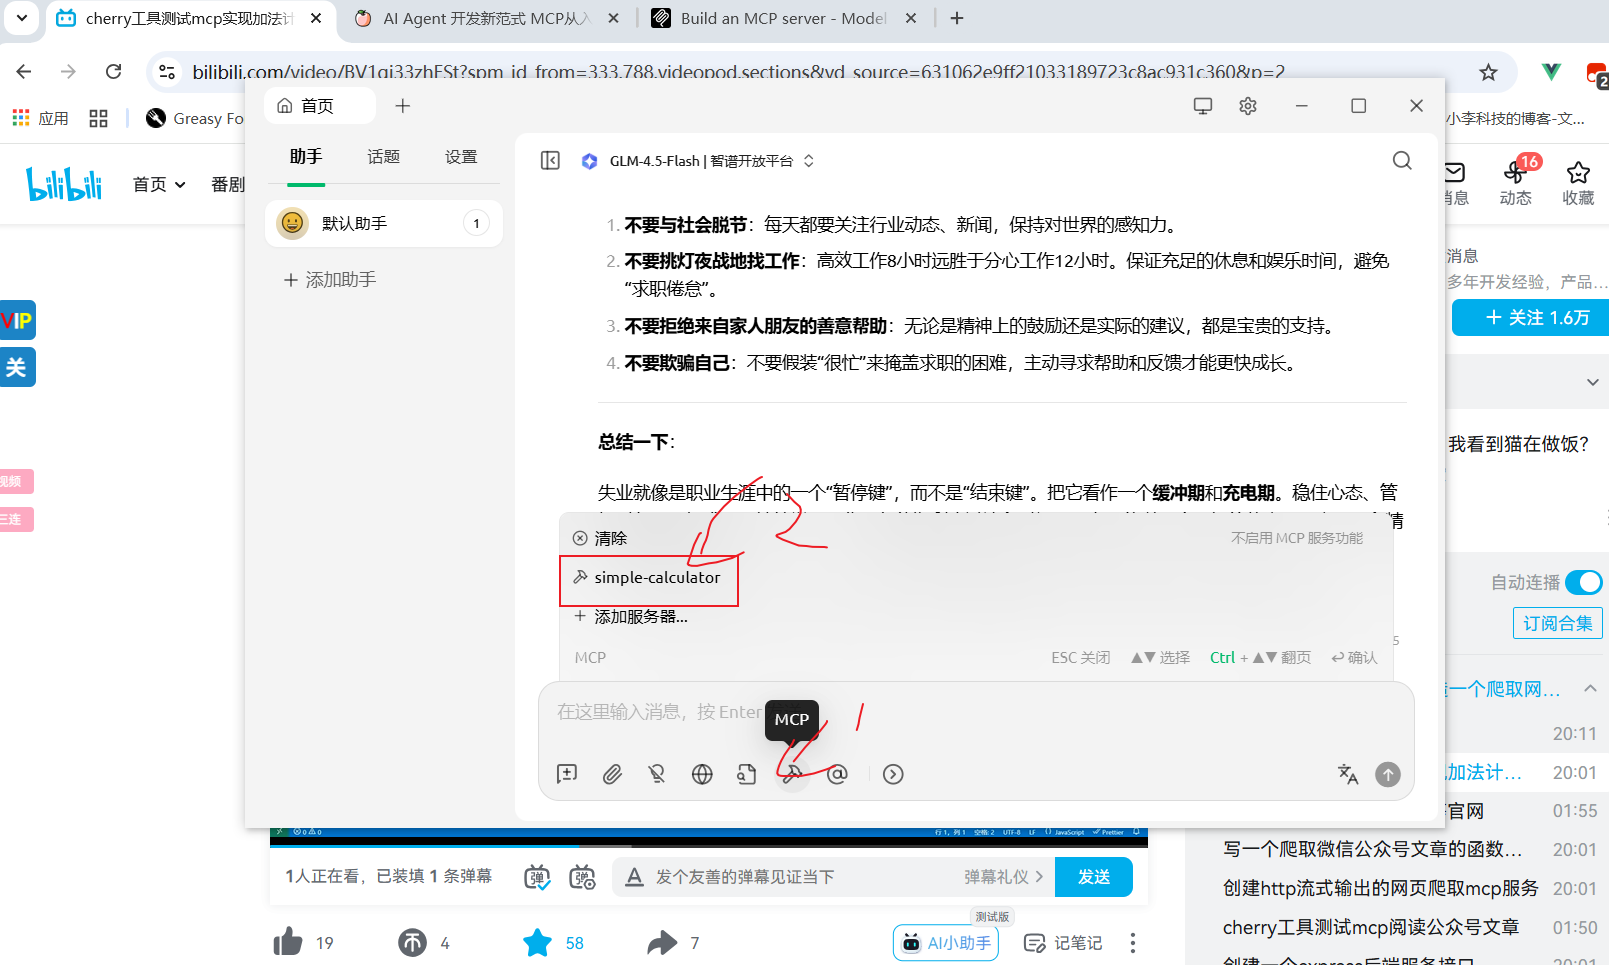
输入提示词 ,让大模型调用工具,然后测试是否调用工具成功
33+78 等于多少,应该使用工具simple-calculator 调用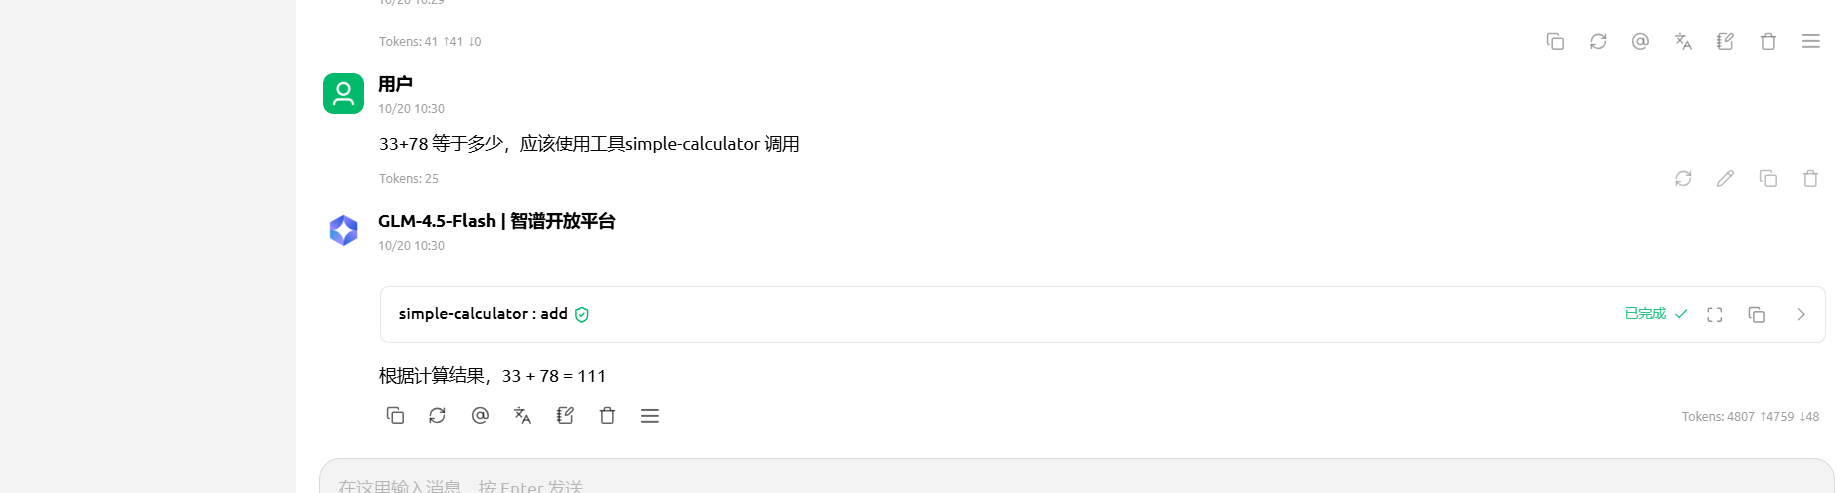
发布到npm上
$ npm build
$ npm login
$ npm publish --access public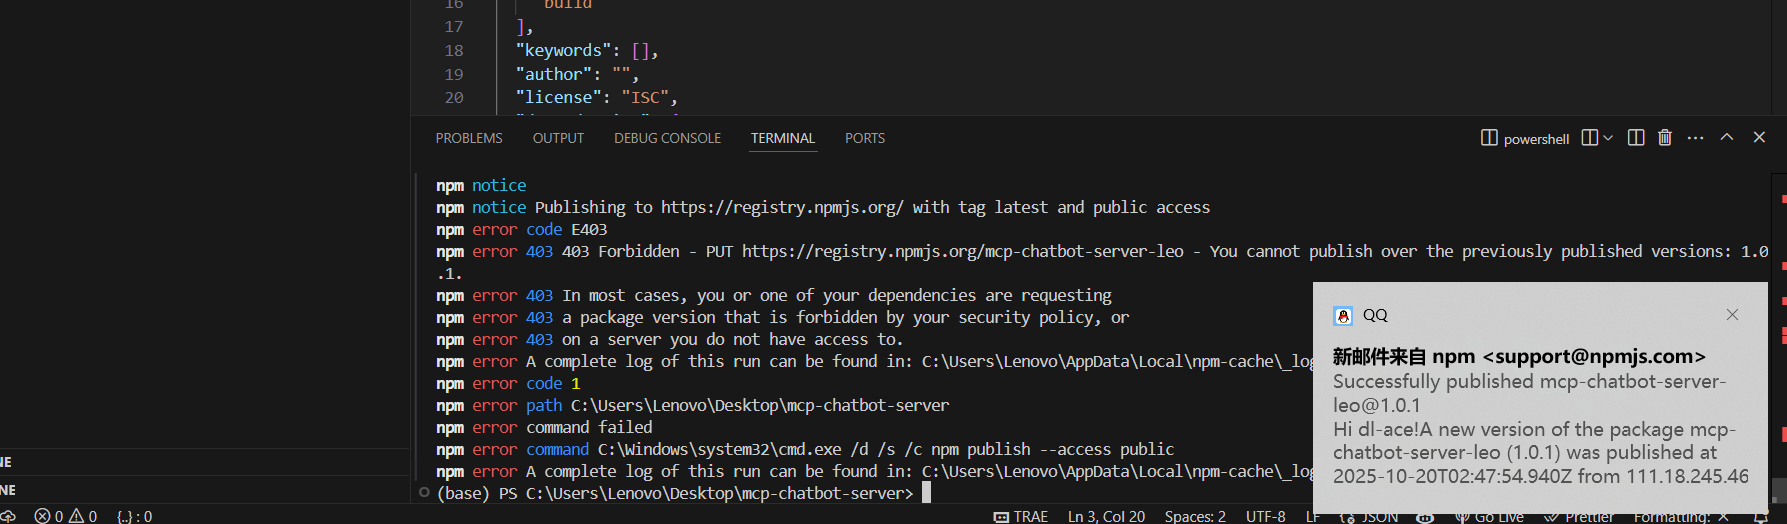
发布成功之后,重新配置mcp服务,这时从npm官网安装这个包
{
  "mcpServers": {
    "simple-calculator": {
      "command": "npx",
      "args": ["-y", "mcp-chatbot-server-leo"]
    }
  }
}测试是否安装成功 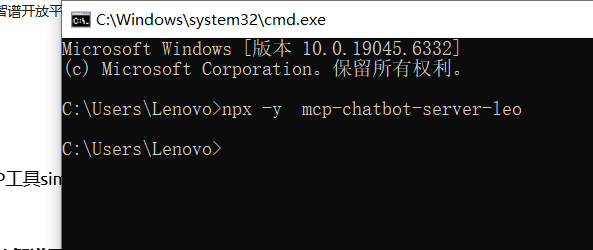
$ npx -y mcp-chatbot-server-leo再次输入提示词,发现已经使用了 npm网站的包,调用工具
使用配置的MCP工具simple-calculator来计算100+23。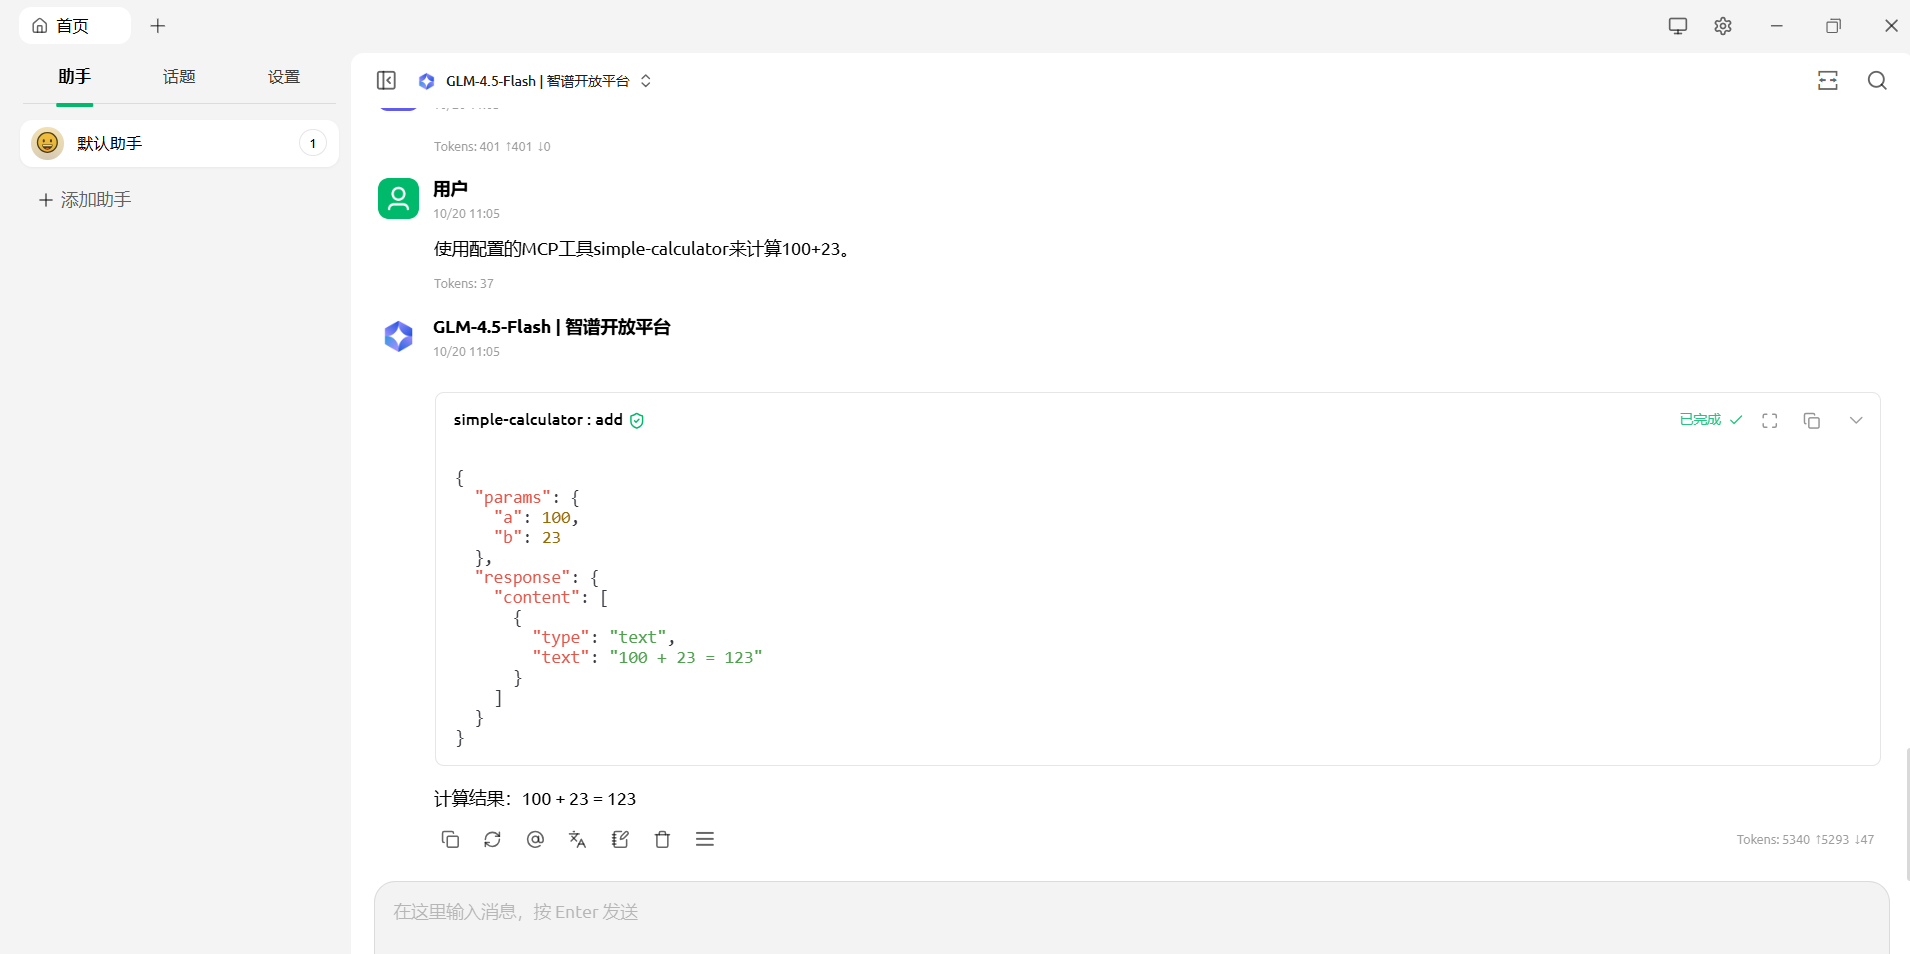
5.5 写一个爬取微信公众号文章的函数功能
实现一个http函数,用于爬取微信公众号内容
npm init -y
cnpm install @modelcontextprotocol/sdk zod@3
cnpm install -D @types/node typescript
cnpm install -D playwright@1.53.2 expressimport { McpServer } from "@modelcontextprotocol/sdk/server/mcp.js";
import { StreamableHTTPServerTransport } from "@modelcontextprotocol/sdk/server/streamableHttp.js";
import { z } from "zod";
import { chromium } from "playwright";
import experss from "express";
const server = new McpServer({
name: "mcp-server-wx",
version: "1.0.0",
});
server.tool(
"crawlWeChatContent",
"爬取获取网页内容",
{
url: z.string().url().describe("需要爬取的网页链接"),
},
async ({ url }) => {
const browser = await chromium.launch({ headless: true });
const page = await browser.newPage();
try {
await page.goto(url, { waitUntil: "domcontentloaded", timeout: 20000 });
await page.waitForSelector("#container-inner", { timeout: 10000 });
const content = await page.$eval("#container-inner", (el) => el.textContent?.trim());
const weixinText = content ? content : "没有爬取到网页数据";
return {
content: [
{
type: "text",
text: weixinText,
},
],
};
} catch (error) {
return {
content: [
{
type: "text",
text: "爬取网页失败了",
},
],
};
} finally {
// 关闭浏览器
await browser.close();
}
}
);
const transport = new StreamableHTTPServerTransport({
sessionIdGenerator: () => crypto.randomUUID(),
});
await server.connect(transport);
const app = experss();
app.post("/weixin", (req, res) => {
transport.handleRequest(req, res).catch(console.error);
});
app.listen(7800, () => {
console.log("mcp服务启动成功,端口是7800");
});
{"mcpServers": {
"mcp-server-wx":{
  "type": "streamableHttp",
  "url": "http://localhost:7800/weixin",
  "headers":{
  "Content-Type":"application/json",
  "Authorization": "Bearer your-token"
  }
 }
}
}启动项目
npm run buildnpm run start导入本地服务器,进行测试http://localhost:7800/weixin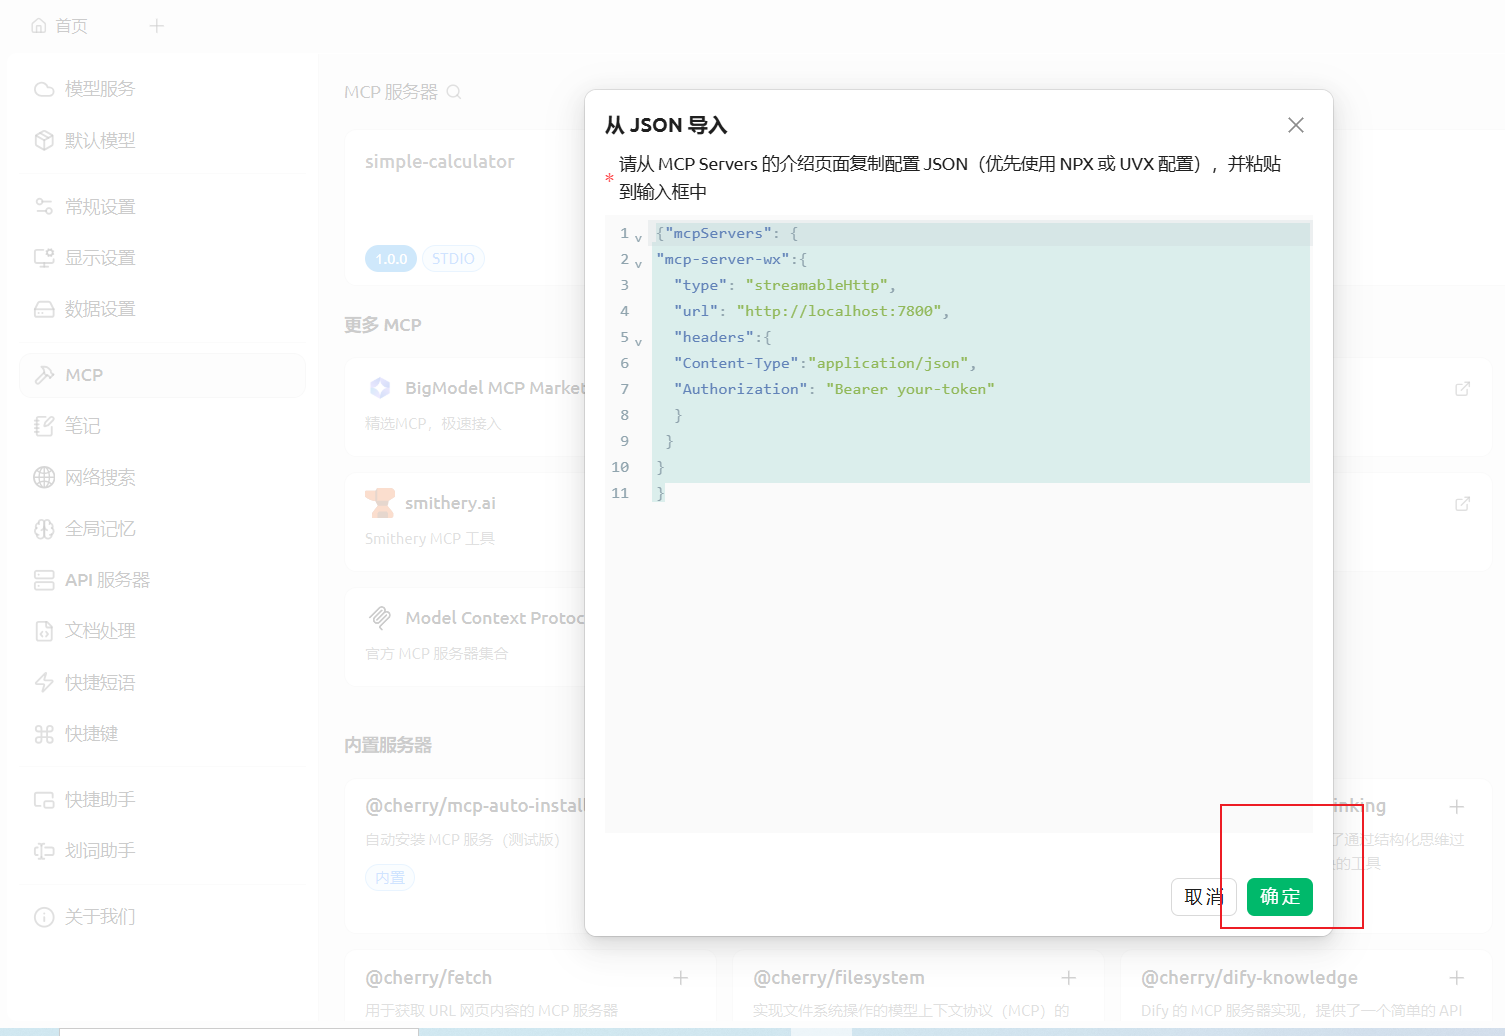
使用mcp-server-wx 工具,爬取https://www.scowboy-blog.top/article/9db8d3d7-5f9a-4fad-a143-55cc8c077c51 , 简单总结下这篇文章的内容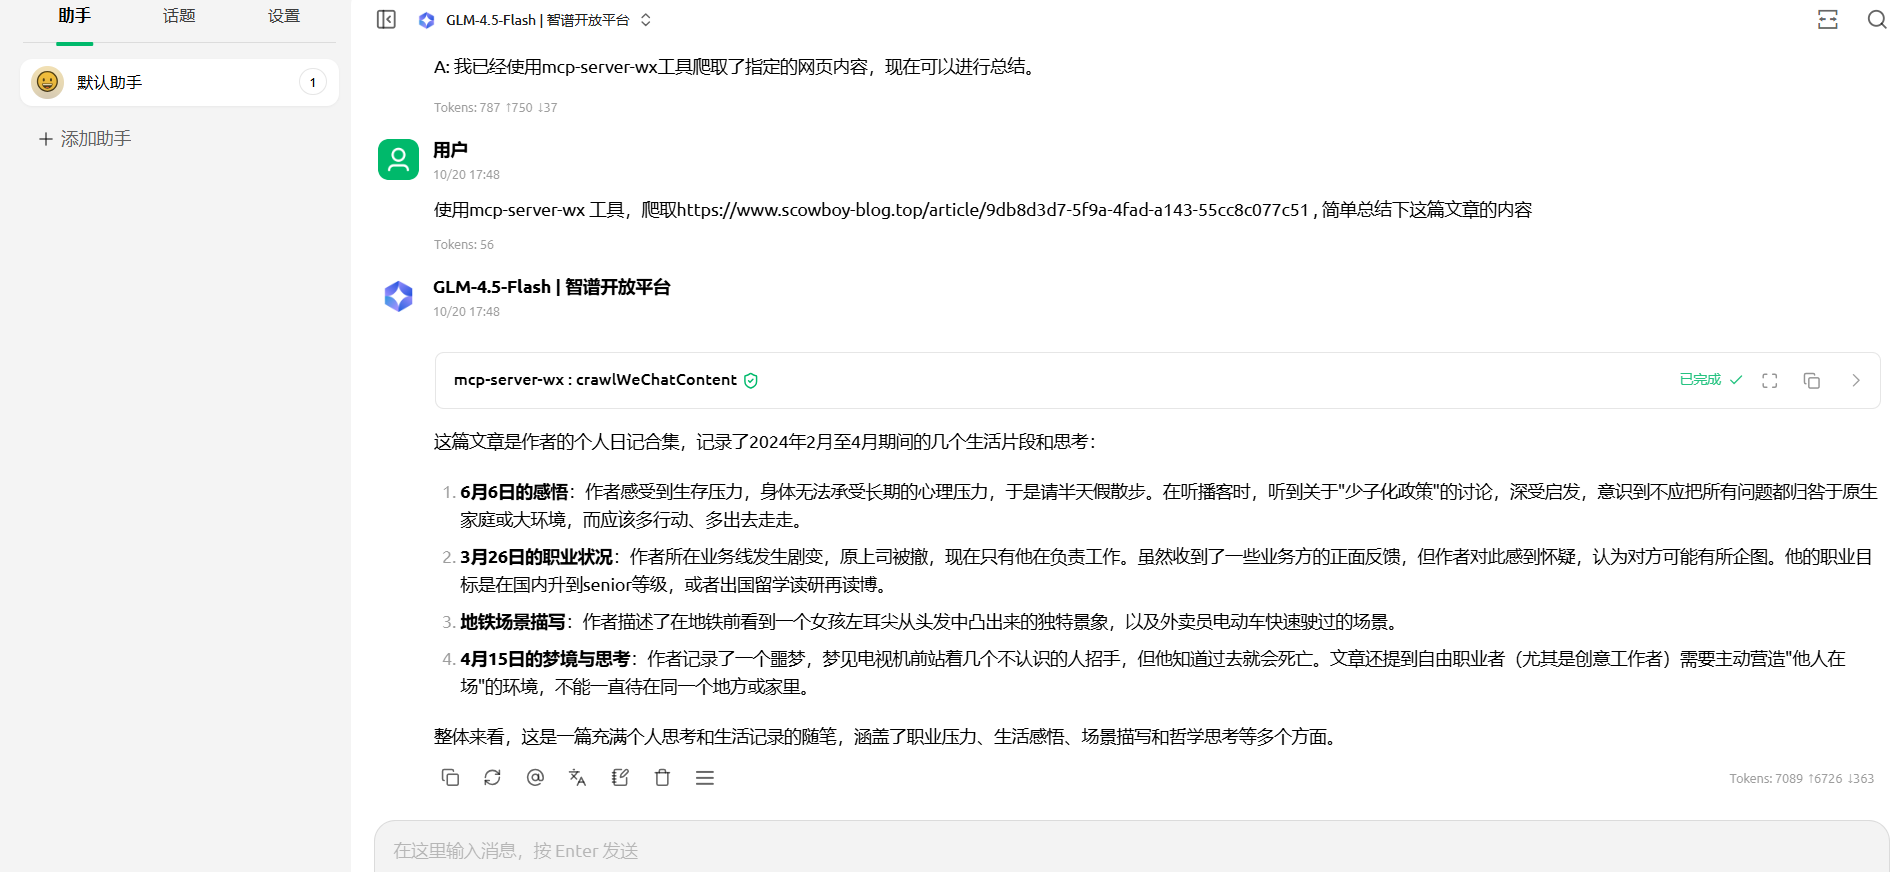
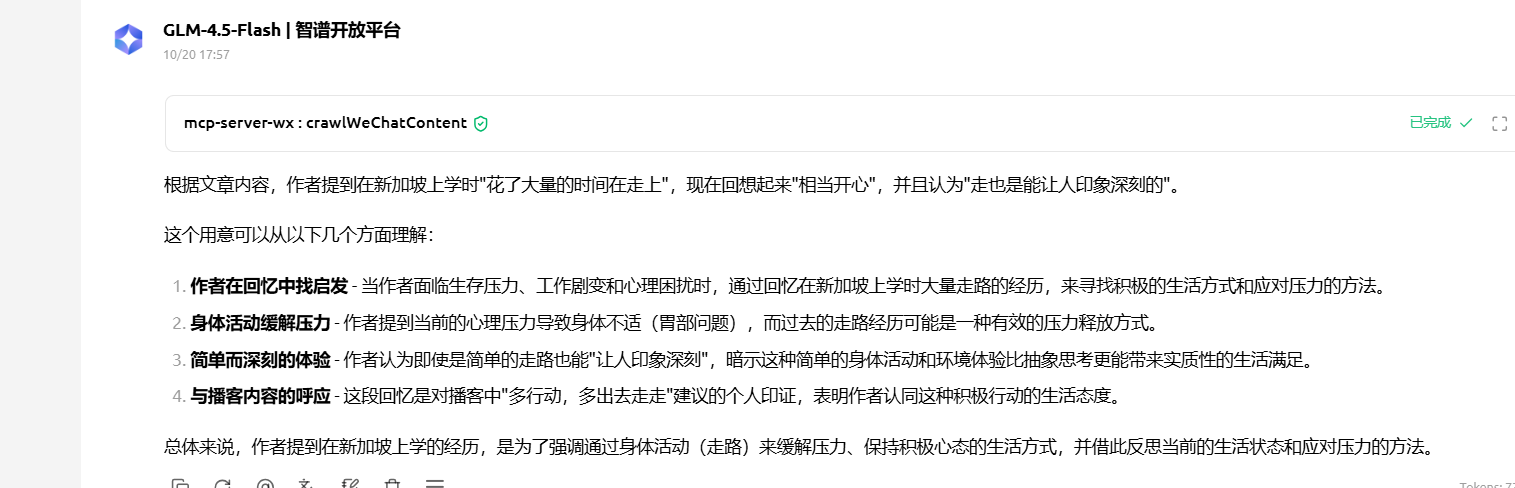
客户端, 与服务器, 与大模型进行交互
8.1 MCP ChatBot 聊天机器人项目
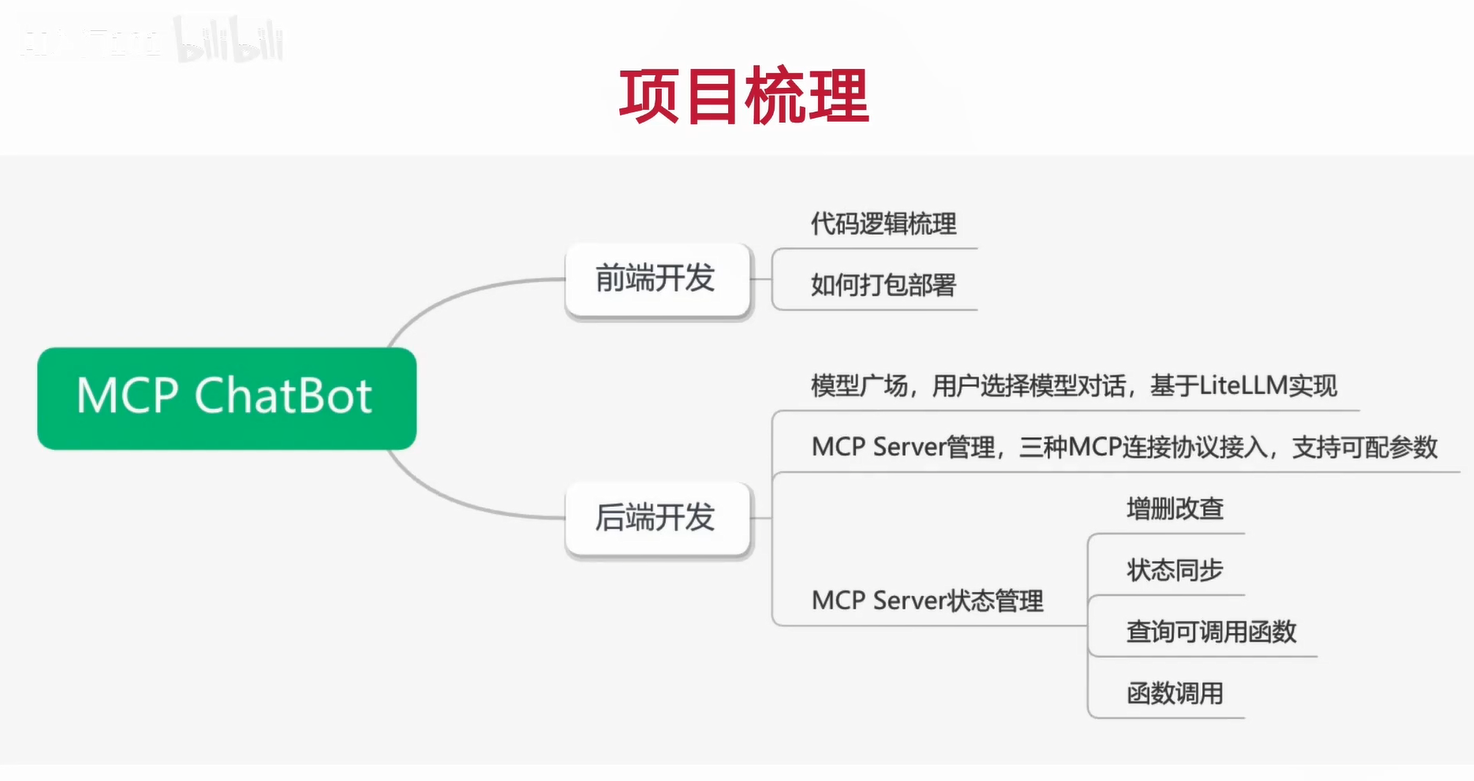
[1]: https://www.bilibili.com/video/BV1gj33zhESt
[2]: https://blog.csdn.net/m0_72678953/article/details/149042341